Make Your Own DIY Concrete Planters On The Cheap.

Ok, are these DIY concrete planters, not the cutest things?
During one of the countless trips to the hardware store during our (still not completed) bathroom renovation, I saw this bucket of shapeable concrete on the shelf. It said “shapes like clay,” and I was all “oh really!”.
I snuck a big bucket of Shapecrete Concrete Mix into one of our orders and tucked it away for some night when we were bored, and I needed something made out of concrete.
It’s concrete that you can pour like regular concrete, but it also can be used like clay.
That was the appeal to me. I love working with clay, and I’ve been coveting a kiln for years. When I find a product that doesn’t require high heat to cure, I am all over it.
When we got home from the hardware store, my husband was perplexed at how I managed to get a 5-gallon bucket of concrete mix into the order without him noticing.
Skill honey, it’s all skill.
How To Make DIY Cement Herb Pots
So I had a few dozen ideas of what I could do with my bucket of Shapecrete Concrete Mix![]() . I saw these cute little herb pots when I was searching Google, but the seller no longer carried them. They looked easy enough, a bit of a concrete and some twine I, and I figured I could recreate them.
. I saw these cute little herb pots when I was searching Google, but the seller no longer carried them. They looked easy enough, a bit of a concrete and some twine I, and I figured I could recreate them.
I have an herb garden on my windowsill, and up until now, I had them in ugly green plastic nursery pots. I know, the horror!
I decided to try my hand at making a concrete planter to see how the clay worked up and what kind of finish I would get when it was it was dry. If it worked the way I wanted, I could make enough for all my indoor herbs.

What is Shapecrete?
Shapecrete is an easy to mix shape-able concrete that can be rolled and molded just like clay. You can also mix it up and pour it into molds. Unlike pourable concrete, you can work it up. The workability is what makes it the perfect medium to use for the project because we want to work the walls up without having to use a pourable mold.
Shapecrete has tiny fibers inside that also give the product structure and stability. With that structure and durability, you lose a bit of smoothness. With that said, pressing the Shapecrete into the side of my molds to create my planters made the most amazingly smooth surface. I was shocked. But if you try to work Shapecrete up with your hands, the product isn’t as naturally smooth as clay.
Materials Required
- A container of Shapecrete ( the 20 pounds size makes many planters, I made 12 and still had clay mix leftover)
- plastic containers in the shape you want your planters
- Twine
Tools Required
- Particle Safety Mask
- Gloves
- Scissors
- Utility knife
- Disposable bowls and stir sticks
- Dropcloth or thick craft paper to cover your working area
Step 1: Safety First
So a few safety tips.
Wear a mask. The particles become very airborne, and you don’t want to be breathing those particles into your lungs. Once the product is mixed, you do not need to continue to wear the mask.
Also, wear gloves. Or you will be trying to get concrete out from under your nails forever. Don’t ask me how I know.
I mean, who works with cement in bare hands anyway? (um, me apparently)
Step 2: Find A Mold
We didn’t have a commercial mold for this project. My fancy-schmancy mold was a recently emptied plastic orange juice container.
Since the container was square(ish) on the bottom, I thought It would work up well. The dimensions were 5.5×5.5, and I cut the top of the OJ container to make the mold 7 inches high.

Step 3: Mixing The Shapecrete and Creating the Pot Shape
The clay can be pressed against the sides and built up. I found that you had to get the right consistency of clay to water. Shapecrete recommends three parts mix to one part water for their clay, but I found I had to add an extra 1/2 cup of mix to get the structuring right.
I added a cup of the mix to the mold and worked it with my fingers to create the bottom.
I kept adding the clay concrete in 1/2 cup increments. I used my fingers to work the concrete against the sides of the mold. I kept working this way until the sides of my pot reached the top. I kept my concrete 1/4 inch thick all the way around.
Make sure you put a hole in the bottom of the planter. I just pushed a finger down into the mold and moved the clay out of the way. It worked perfectly.
Shapecrete claims that its product is workable for 30 minutes. I have no idea if that is the case because I was able to work up the sides and create my concrete pot in about 5 minutes.
I wanted a nice smooth edge to the top of my planters, but I could not cut or trim the concrete the way you can cleanly cut clay, so I just left it rough.
You can sand your concrete pots after they cure, but we warned it’s tedious work.

Step 4: How to cut shapes in your concrete clay – or at least how to attempt to cut shapes in your concrete clay.
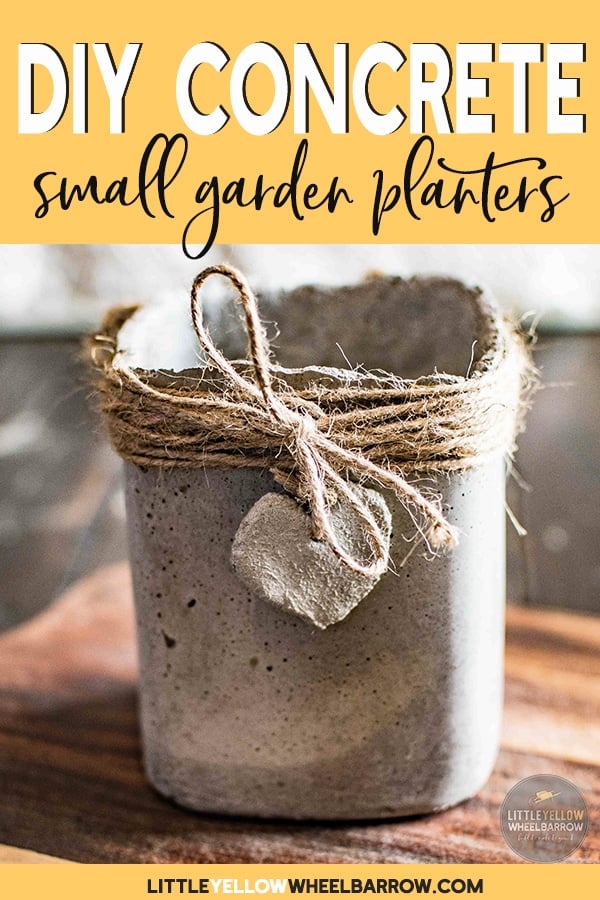
The herb pots that I tracked down on google that no longer existed had a sweet little heart trinket on the front made out of concrete. I liked that touch and felt that it added a bit of dimension to the concrete planters.
Cutting out the concrete was not an easy task.
I sacrificed a small heart-shaped cookie cutter for the project. It didn’t work very well. Since the concrete clay has tiny rocks, and bits of fiber and isn’t smooth like clay, it just wouldn’t cut through cleanly.
I was able to shape and clean up the edges a bit with just a small silicone tip tool that I used to push the concrete around. Once I had a shape that vaguely resembled a heart, I used a dotting tip to create the hole.
My heart trinket dried rough, really rough! I didn’t like the smooth back surface because it had a lot of bubbles, and the front was very textured. I decided to use it anyway even though it didn’t turn out the way I wanted.
Once it was on the concrete planter, I didn’t even notice how rough it was.
Don’t you hate it when your partner says, “I told you so”… ugh, infuriating!

Step 4: How to dry and unmold your DIY concrete planters
I waited the recommended 24 hours for the concrete to cure. I used a utility knife to notch the plastic, and with a simple pull, it ripped down the side, releasing the planter.
I went crazy for the surface. It was incredibly smooth! Exactly what I wanted. The plastic orange juice container gave it the perfect surface to create a nice smooth texture.
I did have a few bubbles here and there. I know you can work them out with vibration, but that wouldn’t work given how the sides of the planter were built up vs. poured. I can live with them; they add a nice touch.
You can see in the photo below how smooth and shiny they were when I pulled back the plastic.


Step 5: How to treat your concrete pots so you can use them as planters
So, concrete isn’t exactly the best for plants. It creates an alkaline environment that most plants will not enjoy.
You have two options here.
# 1. You can soak your small pots in water for a few days, which will leach out much of the alkalinity.
# 2. You can add a plastic container that fits inside the DIY concrete planters.
Although I love the concrete texture and look of the pot, I don’t want to grow something in it that I am going to eat, so I opted for #2 and added a small plastic nursery pot. The ShapeCrete website does state that the product is suitable for herbs, but it does recommend a soaking period before adding your plants.
These concrete plant pots are so lovely and look beautiful with fresh herbs growing on a windowsill. I get compliments about them all the time, and everyone always asks where I bought them.
So what did I think about Shapecrete?
Ok, so I didn’t like working with Shapecrete Concrete Mix![]() at all. I found that it never actually worked up like clay the way I thought it would.
at all. I found that it never actually worked up like clay the way I thought it would.
Although I didn’t enjoy working with the medium, I did love the final product. I have to repeat it, the surface of this little pot was surprisingly smooth!
I am looking forward to the next project already. Even though the medium was challenging to work with, the final results were great.
Are there any concrete projects you are curious about or want to test? Let me know in the comments!
Oh, and a side note, these concrete pots make charming centerpieces.


