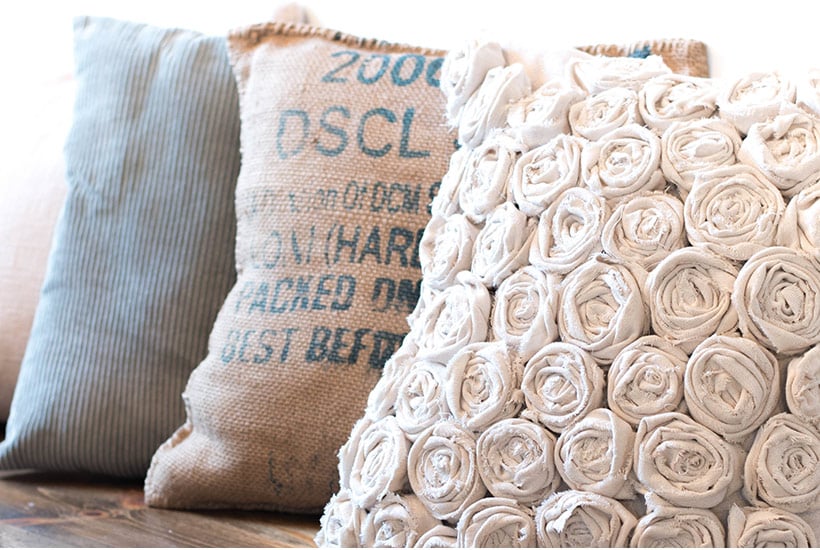
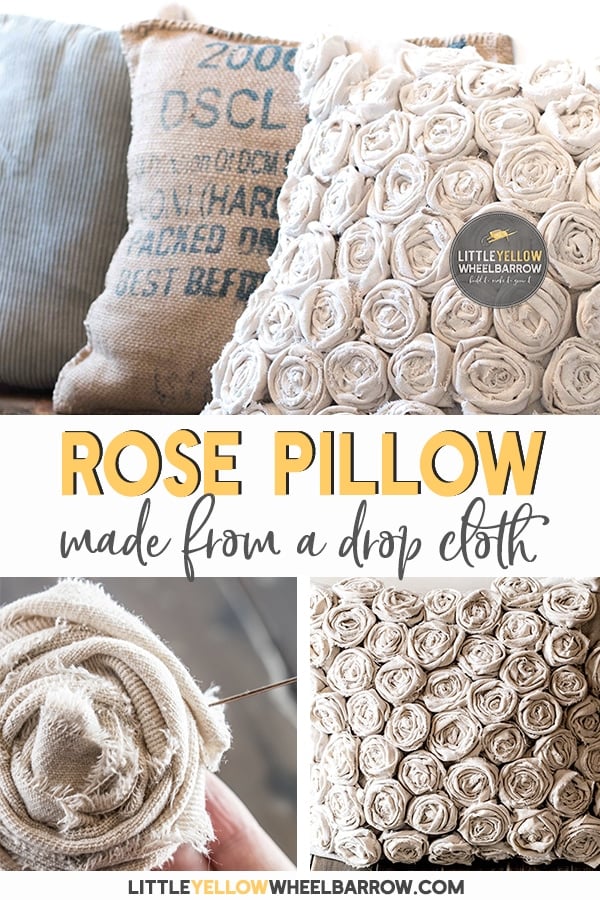
How to DIY a Beautiful Rose Textured Pillow

I love a textured pillow.
They add a bit of homey coziness to a room.
As our bedroom renovation started to wrap up, I went hunting for a few decorative items that could pull the space together. One thing that I wanted but couldn’t find was a textured pillow that would work with our white bedding and farmhouse headboard.
That’s a half lie, I did find something, It was $200, and I have to tell you, I don’t know who is spending $200 on a pillow, but I hope they have a decent retirement plan. Cushions don’t tend to appreciate in value much.
So instead of spending $200 for a single pillow, I opted to make one instead. I wouldn’t have to settle for something off the shelf, and I would save some cash to spend on other items for the bedroom.
A rose textured pillow made from a simple drop cloth
Sewing is not my favorite craft. It’s because my little sewing machine is 23 years old and eats thread. While it devours my thread, it also makes monster noises. Let’s just say it’s on its last legs and causes me a lot of frustration. So instead of losing my mind with my little monster sewing machine, I opted to hand sew all the canvas roses.
The materials for this project were minimal. Find the right fabric, pillow form, a sewing needle, and some thread. Easy peasy.
Finding the right fabric
~This post may contain affiliate links. If you click one and make a purchase, I may receive a commission at no additional cost to you.~
Fabric shops and I don’t get along. I find they are all disorganized and confusing, and I hate spending too much time hunting for what I need. I spent an hour chasing through a fabric shop for cream or beige colored fabric that was close to canvas or something equally as heavy. I didn’t think it was going to be difficult to find, but I was wrong.
After an hour of aimless roaming, I gave up.
Since I had to also make a trip to Home Depot before heading home, I cut my losses and decided to put my textured pillow project on the back burner.
Of course, as soon as I gave up, I found the perfect thing at Home Depot. I always do. Hardware stores are like my jam now. I can wander around a big hardware store for hours without getting agitated.
I found my fabric in the paint dept of all places. It was a painter’s drop cloth canvas made from cotton. I bought the 4×12 ft. You can find a similar drop cloth on Amazon: 4 x 12 All Purpose Canvas Cotton Drop Cloth.
I’ve have used them before both for painting and DIY. I once made very realistic Restoration Hardware duvet knockoff out of drop cloths so I knew it would work. Why didn’t I think of that before?
How to prepare your canvas for sewing.
I took the canvas home and prepped it for sewing.
The canvas drop cloths are raw cotton. They are very rough and have a stiffening agent on them that you need to get off. I’ve worked with drop cloths before as fabric, and I had the best luck with the Home Depot cloths because they had the least amount of oddities in the fabric.
If you remove the stiffener, the canvas turns into a soft linen-like fabric. It does take some work to get it that level, but trust me, it’s worth it.
Soak your drop cloth on the stove in a giant pot of boiling water with a cup of vinegar. I don’t cook it on the stove, I just add the canvas to the boiling water and let it sit overnight. I use a 15-gallon stock pot. You can cut down your drop cloth to make it fit if you’re using a smaller pot.
In the morning toss your canvas into the washing machine and wash on hot.
Once the wash cycle finishes up, you can go ahead and toss your fabric into the dryer.
I usually give the fabric a feel after it’s dry and if it still isn’t soft I repeat the process. I didn’t have to with this canvas fabric because I wanted it pliable but still a bit stiff.
Making The Roses For Your Textured Pillow
So now that you have your fabric, it’s time to make the roses.
Start by cutting 1-inch strips from your canvas. They don’t have to be perfect. The less precise they are, the better. The easiest way to do this is to cut a notch in the fabric and give it a good rip.
I ripped my 4×15 inch canvas on the 4 ft length and made about 50 1 inch strips 48 inches long.

To make the roses roll pinch one end of fabric strip and start to wind the fabric around the end.
Keep rolling and twisting your strips around. They don’t have to be perfect, but they do need to be flat so that you can slide a needle through the center to fasten it together.
I cut my strips all the same length, but I still ended up with different size roses due to how I rolled them or how wide I cut the fabric. The trick to get areas that look like petals is to twist your strips as you are rolling them around. The folds are what give the little rosettes most of their texture.
When you’ve completed rolling up your rose, you’re going to pass a needle and thread directly through the center. Do this for a few passes. Turn it over to add additional hand stitching to the back. It only takes a few minutes per flower.
I made 50 roses over the course of a few days. I only stabbed myself with the needle 27 times.

Making your textured pillow cover
You can use a pillow cover that you already have. You could even directly sew your little roses onto a pillow that is no longer in your rotation.
I like my pillow covers to be removable, but sit nice and tight and not look sloppy. For this, I use an envelope pillowcase pattern. They are super easy to make and require no buttons or zippers. If you’re like me and sewing is not your best skill, this one is straight lines and only two short hems. Pocket pillows are the lazy DIY’ers best sewing project!
You will have enough fabric from one 4×15 canvas drop cloth to make enough roses and a single 18×18 pillow cover.
There is a great DIY tutorial from Hey There Home for an envelope pillow cover. I did have the link up, but it was creating some odd Pinterest glitches. If you google Hey There Home or envelope pillow cover, Cory’s tutorial from Hey There Home will come up on the front page.
Attaching your textured roses to your pillow cover
Sewing your roses on to your pillow takes a bit of patience. You need to ensure that they won’t come off in the wash if you plan on ever tossing it into the washing machine.
I started in the center and worked my way out, but you can pretty much start anywhere. Just make sure that the sides of your roses are touching and you can’t see the pillow cover.

Cleaning up the threads
Once you have all your little roses sewn to your pillow cover, it’s time to clean it up. I went through with a tiny pair of scissors and cut away all the loose threads.
I like the frayed edges. The texture of the fabric edge adds a bit of rustic charm to the pillow.
If you don’t like the look of the frayed edges, you have a few options.
- You could cut your strips with pinking shears. It would change the look, but there wouldn’t be much fraying.
- If you have a serger, you could also serge your canvas strips.
- If you’re careful, you can fold your strips over and only use the folded edge to make your roses. I don’t find they have as much texture, but this will eliminate the raw edge.
The textured pillow results
The total for this craft was only the cost of the canvas. A big whopping $19.00 CDN. Since I already had the pillow form, this was a very economical DIY project.
I love how my textured pillow turned out. It’s so much better when a DIY ends up being a win vs. a fail.
This is also a perfect craft project for Valentine’s Day. The roses have a bit of a romance edge to them and would fit in with any decor without popping those bright pinks and reds around your home.

Speaking of DIY fail, if you’re interested in watching me lose my mind on a project, you should check out this post: ARM KNITTING FAIL A CHUNKY KNIT BLANKET.


