How To Make Perfectly Crunchy Homemade Dill Pickles

Making homemade dill pickles is an art. Ask anyone who makes pickles and they will probably tell you about an heirloom recipe passed down for generations. They might drone on about it for, oh I don’t know, 1800 words or so.
You can always scroll down to just grab the recipe, BUT there is an excellent story about this recipe, and you might get a chuckle or two if you stay with me.

CRUNCHY DILL PICKLE RECIPE: THIS IS OUR STORY
When we first planted our garden, I added a few pickling cucumber plants thinking I would make a few quarts for fun. My husband was not at all interested in this endeavor because his recollection of homemade dill pickles differed significantly from mine.
His memories of homemade dill pickles were soft, mushy little vessels of pure vinegar that made your mouth pucker for a week.
I made them anyway, tossing his concern to the wind. I bottled ten beautiful jars that summer and they were elegant green gems in pristine glass bottles that I obsessively admired.
That was the start of the homemade canning obsession.
Oh, and if you are curious, when we finally cracked them open three months later, they were flipping awesome.
I was very disappointed we only made ten jars. Those homemade pickles vanished from the pantry before we harvested our fall cinderella pumpkins.
The following year I made 24 quarts, the year after that 32. We even threw in a couple of cans of pickled jalapenos – we still run out long before the next batches are ready.
I don’t think I have a garden big enough to grow enough cucumbers for the two of us for a year!

THE FIRST HOMEMADE DILL PICKLE BATCH OF THE SEASON
I was surprised yesterday when my husband said we should harvest the cucumbers. I haven’t been checking them because the last time I did, we didn’t have much so I figured it was going to be quite a while.
To make a batch worthwhile, you need to have quite a few and I didn’t think we had more than a handful because it was still quite early in the season for us.
He ignored me, of course, and went and pulled all the cucumbers from our vines and came in with a huge bucket that he presented to me on the counter with a thud that said: “Told you so.”
I was pleasantly surprised to see that they had set quite prolifically! If the vines hold out (fingers crossed), we may hit this year’s quota of 48 quarts!
THE PERFECT RECIPE TO MAKE THE BEST HOMEMADE DILL PICKLES
You know how some people go to thrift stores or garage sales and find things like $100,000 lost artworks? Yeah, well I have one of those finds. Ok, maybe not $100,000 catch but still – what I discovered was almost as good.
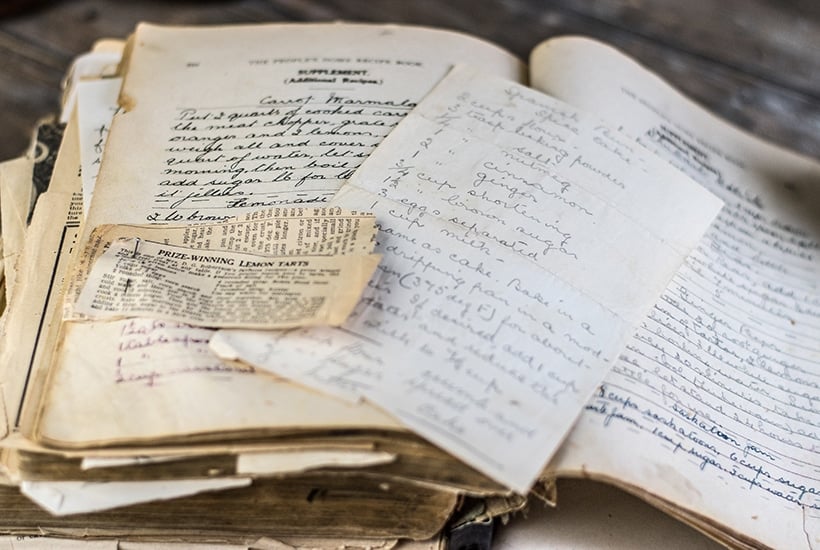
During a summer garage sale, I stumbled on a 100-year-old homesteading book. It was in seriously rough shape, but since I am a lover of things that need tending, I picked it up.
I thought for a dollar it would, at the very least, make another pretty flower pressing book (because you can’t have enough of those!).
When I got home, I realized the book was three books:
- Homeopathic medicine book
- Agricultural reference manual
- A cookbook
Oh my god, a 100-year-old recipe book- what on earth was I going to find in there?
It was a treasure trove! The book recipes are super exciting, but the handwritten notes on beautiful cards were the highlight. The small clippings cut out of old newspapers delicately pinned inside the book were so incredibly charming, I just about lost my mind.
I found my original recipe for rhubarb jam the exact same way. There are countless beautiful recipes from the past if you’re lucky enough to find them.
I kept thinking about the women who had that book through those ten decades, and it left me very nostalgic.
There were recipes for award-winning lemon tarts (yes please, let me test that), recipes for weird sounding salads (yup, gonna test those out on hubby), and a beautiful recipe for homemade dill pickles.
That recipe had a brine ratio that was perfect! Not too much vinegar, not too much salt. And, in the end, created the best pickle I ever ate.
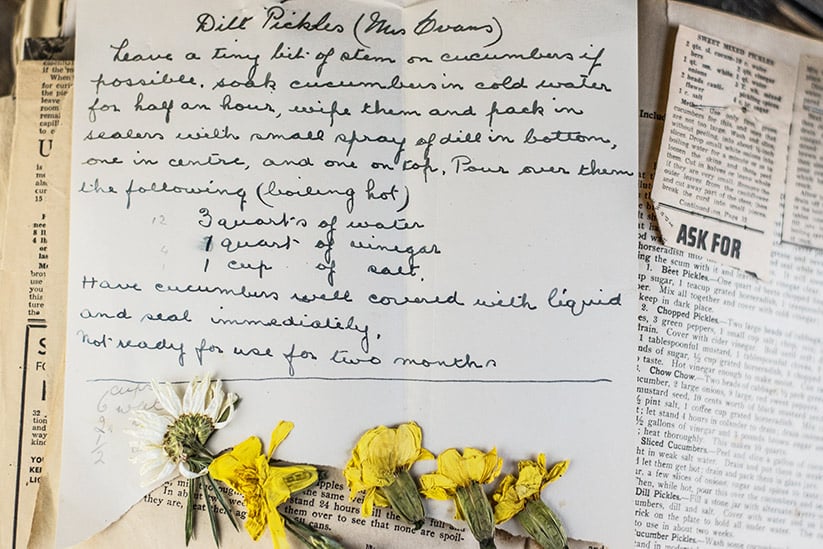
MRS. EVANS’ HOMEMADE DILL PICKLE RECIPE
It’s unclear how old the recipe card is. The recipe was written on beautiful vellum paper (I looked for a watermark to see if I could date it like the wild NCIS recipe sleuth that I am, but no dice). Although the book itself is copyrighted for 1914, there were recipes from newspapers dating in the ’40s, and 50’s, so it’s unclear the actual age of the recipe.
This recipe card grabbed my attention immediately because of the perfect handwriting.
The card read, “Homemade Dill Pickles – Mrs. Evans”.
I felt if someone was going to spend the time to write down and save Mrs. Evans’ Homemade Dill Pickle recipe with such care, it had to be a winner.
There was also something tugging at me about this recipe because I feel like it was known back then, around these parts, that Mrs. Evans’ homemade dill pickle recipe was the one worth keeping.
It almost feels historical to me, but I’m a crackpot for this stuff. I love anything old, vintage, or historical – that’s my jam, or in this case, my pickle.
And as crackpotty (oh look I made up another word) as my brain might be, I was right in this instance.
Mrs. Evans’ pickle recipe was bloody perfect. The perfect brine ratio of salt, vinegar, and water – and FRESH dill!
WHY YOU SHOULD ONLY USE FRESH DILL IN A PICKLE RECIPE
I’m going to put on my serious face here for a second and stand on my soapbox and ring a bell and get everyone to gather around for a listen.
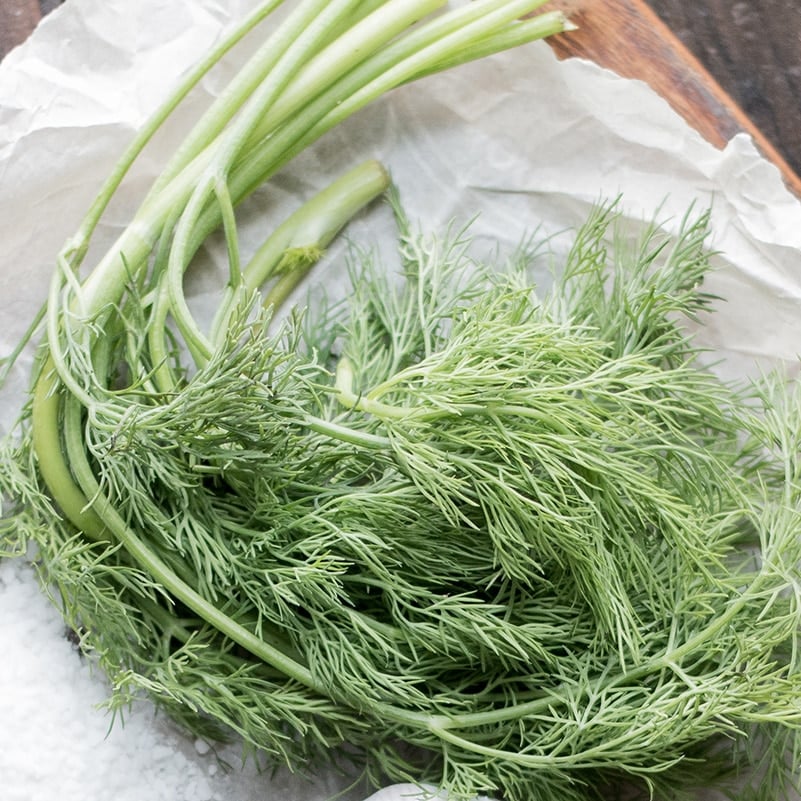
If you’re going to take the time to craft homemade dill pickles, do Mrs. Evans a solid and make her recipe with FRESH dill. Don’t skimp! Fresh ingredients make all the difference in the world.
The time and effort it takes to grow your cucumbers, preserve them and then wait three months before you can eat them make me feel adamant that the process is worth the fresh dill.
Note: Most recipes call for dill seed but I prefer the taste of fresh 100% over dill seed. We tested both last year, and we both wholeheartedly agreed that the homemade pickles made with dill seed were nowhere near as good as the ones with fresh dill.
Ok, Laura shut up about the pickles and the dill already and give us the recipe (I know, I can hear you!)
But I have one more thing to tell you before I share the recipe…
THE SECRET TRICK TO MAKING CRUNCHY PICKLES
How to make your own pickles:
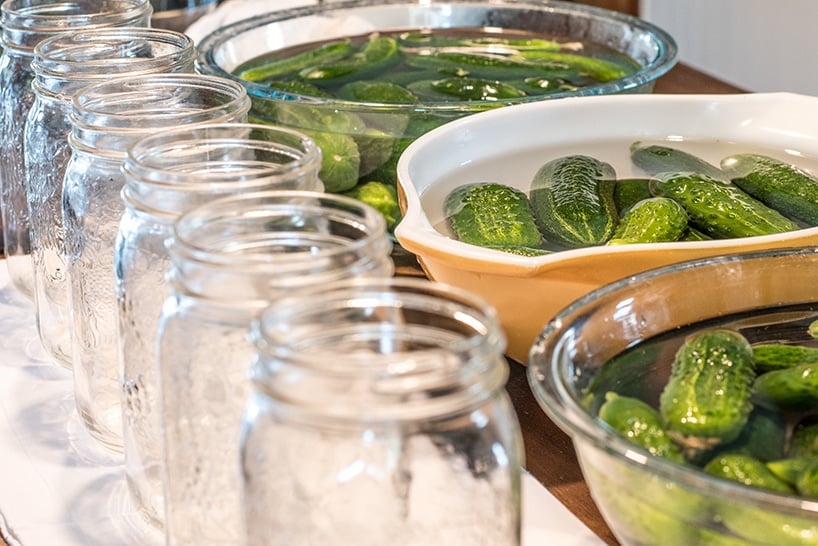
If you want crunchy pickles (you do, trust me) and not soggy, horrible, blasphemy pickles, you need cucumbers as fresh as fresh can be. That means picked this morning, cleaned and soaked in cold water for an hour and processed the same day.
What? I never said it was going to be easy; I just said if you wanted perfect crunchy pickles, I knew how to get them!
You also need to ensure you remove the blossom end. If the blossom end remains, it will release enzymes that will make your pickles mushy over time.
The third piece to the crunchy pickle puzzle is a secret ingredient. I use Ball Pickle Crisp granules.
What are pickle crisp granules? Pickle crisp is a calcium chloride additive made by Ball that prevents the cucumbers from going soft. Since I started adding pickle crisp granules to my pickle jars, I’ve never had to endure another soggy blasphemy pickle!
HOMEMADE DILL PICKLE RECIPE
Okay, here it is.
But, I do have a couple of more tips to share so save that recipe and keep on reading!

How to Make Perfectly Crunchy Homemade Dill Pickles
Crunchy homemade dill pickles that stay crisp even after processing. These garlic dills are lip puckering perfection.
Ingredients
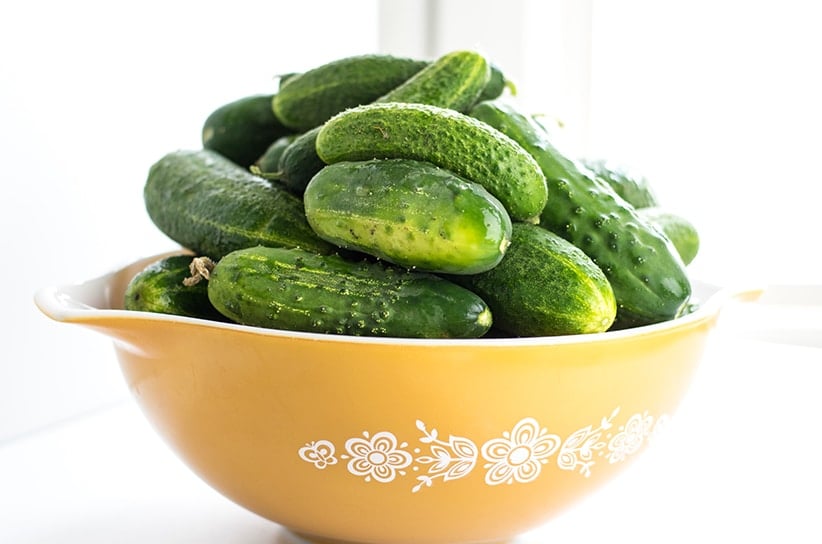
- 6 pounds fresh pickling cucumbers
- 3 quarts fresh water
- 1-quart pickling vinegar (7%) * see note below
- 3/4 cup pickling salt
- 7 tsp black peppercorns
- 7-14 cloves fresh garlic
- 7 tsp Sriracha (or red pepper flakes) , optional
- 7-14 sprigs fresh dill
- 2 tsp Pickle Crisp
Instructions
- Clean and prepare cucumbers. Wash off the debris and clean your cucumbers under cool running water. Once clean, cover with cool water and leave for an hour.

- Prepare 8 quart-sized mason jars, lids, and canner for processing. Start your water bath now so it is ready when it is time to process the jars.
- Add two whole garlic cloves, a sprig or two of fresh dill, 1 tsp peppercorns to the bottom of the mason jars along with 1/4 tsp of Pickle Crisp

- Prepare the brine. Add the water, vinegar, and salt to a large pot and bring to a rolling boil.
- Remove the blossom end from the cucumbers and begin filling the jars. You can add spears, or whole cucumbers, but keep them on the thick side. Do not make your spears too small.
- Pack the mason jars tight with your cucumbers leaving at least 1-inch headspace at the top.
- Ladle, or carefully pour the boiling brine over the top of the pickle jars leaving 1/2 inch headspace.
- Gently press a spatula against the pickles and down the inside of the jar to create a path for trapped air to escape. Repeat several times around the inside of the jar.
- Wipe the rims, add the lids and rings, and twist until finger tight.
- Process in a water bath for 15 minutes for quarts, 10 minutes for pints). Remove your jars from the water bath and set them aside where they will not be disturbed. Be sure to use a cutting board, trivet, or dishcloth underneath to protect your surface from the hot jars. For high altitude locations please check notes below for link with proper water bath timings.
- Leave to rest for 24 hours without disturbing.
- Check to ensure the jars sealed. They are good for up to a year in storage. If the lids did not seal, do not attempt to reseal. You can refrigerate any unsealed jars up to 4 weeks.

Notes
- For high altitude locations, please verify your water bath canning times with your local extension.
- Alternate brine recipe: If you cannot find pickling vinegar at 7%, go ahead and use regular distilled white vinegar, at a 1:1 ratio. For this recipe, it would mean changing the water to 2 quarts and the vinegar to 2 quarts).
Nutrition Information:
Yield: 16 Serving Size: 1Amount Per Serving: Calories: 22Total Fat: 1gSaturated Fat: 0gTrans Fat: 0gUnsaturated Fat: 1gCholesterol: 0mgSodium: 122mgCarbohydrates: 4gNet Carbohydrates: 3gFiber: 1gSugar: 1gProtein: 0g
ADAPTIONS I MADE TO THIS PICKLE CANNING RECIPE
- For this recipe, I used 7% pickling vinegar. It’s much stronger and requires less vinegar vs. water in the batch. I made the assumption this is what was used since the acidic solution was low.
- If you do not have access to picking vinegar, you can use white distilled vinegar at a 1:1 ratio. The recipe would call for 2 quarts of water and 2 quarts of regular distilled vinegar.
- Also, please check your local food safety extensions if you are at a high altitude. The processing times will vary greatly!
- I also took liberties with the recipe as far as spices go. We added in a bunch because we like spicy garlic pickles.
- The other change we made was to make the pickles in a water bath canner and follow the safe canning recommendations for quart size pickle jars.
FREQUENTLY ASKED QUESTIONS ABOUT HOMEMADE CRUNCHY PICKLES
After I had shared this canning recipe with others, I did get some really good questions I wanted to share with you all. Just in case you were also wondering the same…
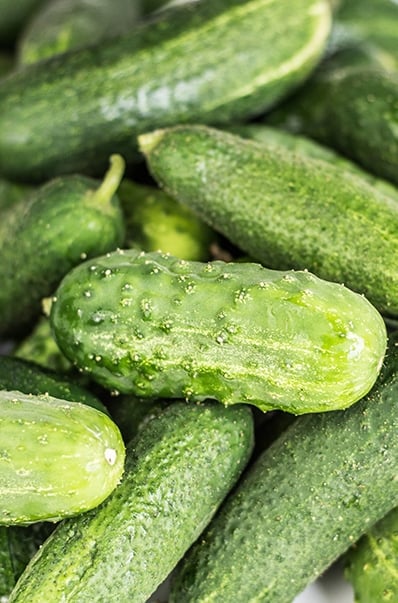
WHAT KIND OF CUCUMBERS DO YOU NEED TO MAKE THIS PICKLE CANNING RECIPE?
You can’t make homemade dill pickles with regular cucumbers; you need to have freshly picked pickling cucumbers.
I’ve been testing cucumbers for a few years, and I still haven’t landed on the one that will be a mainstay in the garden plan every year. This year, I tested “Cool Breeze” and “Homemade Pickles”.
The former has a case of gummy stem blight and the latter has a touch of powdery mildew. They both grow in the same bed up trellises, and it’s fascinating to see that the diseases have not passed to each other (yet).
We’re about a third of the way through our growing season, and I’m a might bit worried that as the season progresses, my yields will trickle off due to the current disease floating around my pickle bed.
The horror of all horrors that we might have to survive a dill pickless winter. (I like to make up words, I added pickless to my homemade dictionary. A testament that around my house you can DIY anything you want including words).
I haven’t found a cucumber cultivar yet that I didn’t have a mid-season issue with, but I continue my hunt.
For now, the vines are producing well.
IS THERE AN OPTION BEYOND PICKLE CRISP FOR CRUNCHY HOMEMADE DILL PICKLES?
If you want to go au naturale, you can try the grape leaf method!
Add two grape leaves to the top and bottom of your pickle jars before canning. This method is claimed to yield crunchy pickles.
I haven’t tested it because where I live, you’re hard-pressed to find grapevines just growing in the wild.
If you want a more crunchy way to do it – grape leaves might do it for you.
LAST-MINUTE TIPS ABOUT PICKLE MAKING
- These homemade dill pickles require at least three months of storage before they are ready to eat.
- We add lots of spicy heat to our jars and find that one tsp of Sriracha gives us a nice kick. Go easy on the spice because they do develop and tend to get stronger over time.
- My suggestion if you are unsure how hot you want them is to do a few tests and mark your jars. This way you know for next year what was perfect.
- You can get a bit creative with the “mix-ins” for your pickles. We’ve tried all kinds, and this recipe is by far our favorite. This year, we’re going to test adding smoked kosher salt to see what impact it will have on the flavor of the homemade dill pickles. I’ll update the blog post if it is a winner!
More Canning & Preserving Resources:
- Have Too Many Jalapeños? Here’s What To Do With Extra Jalapeños!
- How To Pickle Jalapenos To Last You All Winter
- How to Make the Most Amazing Rhubarb Jam Without Sugar
- Have Too Many Cucumbers? Here’s What To Do With Extra Cucumbers!
- Jalapeno Pepper Jelly Recipe – Quick & Easy Instructions!
- Easy Quick Pickled Red Onions Recipe
- How to Freeze Green Beans To Preserve Texture and Flavor!
- Canning Tomatoes Whole – The Quick and Easy Cold Pack Method
- How to Dehydrate Jalapenos at Home
- How Hot are Jalapenos on the Scoville Scale?


