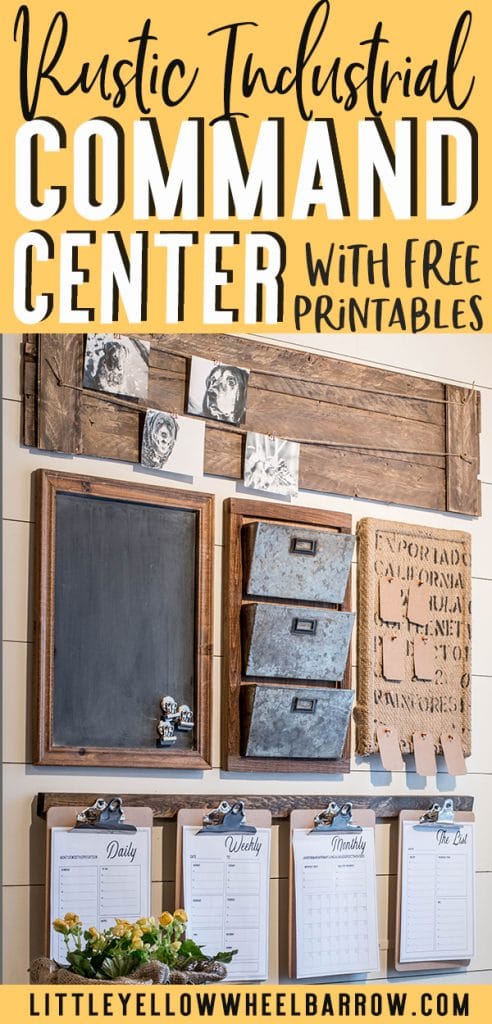
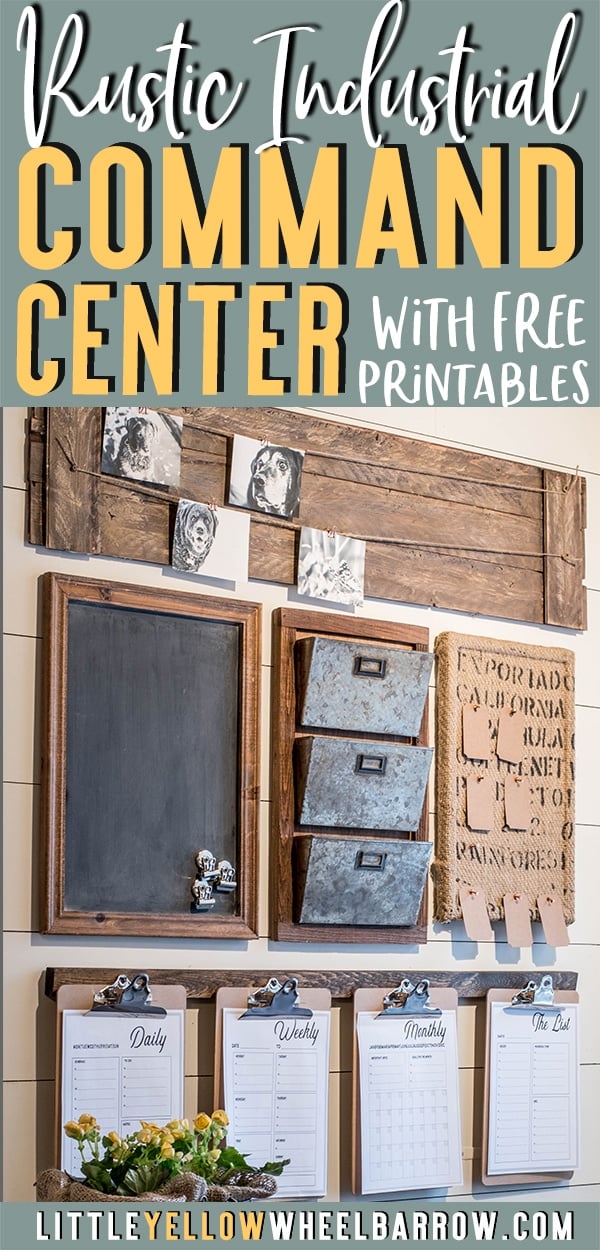
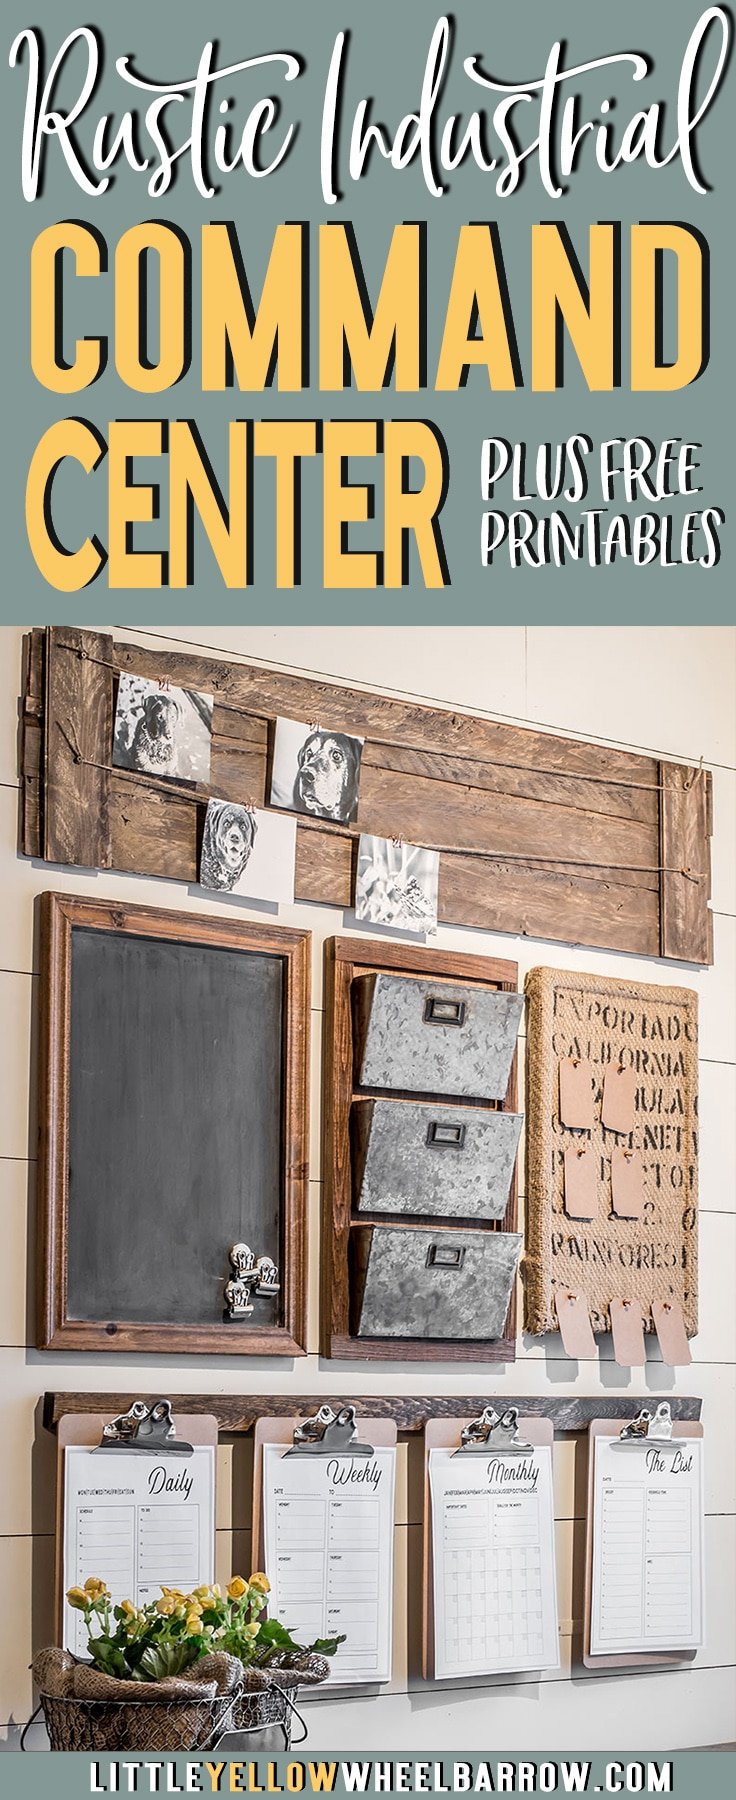
A Rustic Style Home Command Center Perfect for a Small Space.


I need an office, but I currently have no space. Building a home command center on my only free wall is about my only hope right now of creating any office space.
I always seem to be crunching space to make room for the things I want. It doesn’t matter if the area is 700 square feet or 1500 square feet.
We do have the two extra bedrooms upstairs, but we’re mid-renovation up there, and the whole thing is a disaster so I can’t yet put my office space up there. Once we finish renovating, I have big plans for a home office. In the meantime, I have to try to make do with the space that I do have.
How to build a custom home command center when space is limited.
So what do I do?
I read somewhere a while back that in design you can divide up a room into thirds and use a third for a separate purpose. Maybe I hallucinated that one or made it up in my head, but it sounds legit, doesn’t it? Like a nook in a kitchen, or a reading space in a bedroom. My choice? Office in the living room!
The corner of the living room was the perfect spot for a small home office. It had two beautiful double hung antique windows and a wall space that I could use for organization. It was the ideal location for my vintage desk.
That’s all I had. A desk, no drawers, no storage and no space to keep my workflow.
I did find a nifty little farmhouse end table that I refinished inside and out to house all my camera lenses and do-dads and sat it next to the desk. That made the space usable, but I was still struggling with how to make the “office” space functional.
Enter the Farmhouse Style Home Command Center
Since this whole thing resides in my living room, I had to get a little creative with how we made our home command center. It had to have a rustic feel to match the style of the room. It also had to be cute and look like wall art or a gallery wall at first glance, so it didn’t look out of place.
I broke the space down to what I wanted. I needed something to jot notes, a push-pin board, somewhere to keep mail and clipboards for scheduling. It also had to have a picture hanger space so that the home command center looked a bit more like a gallery wall.
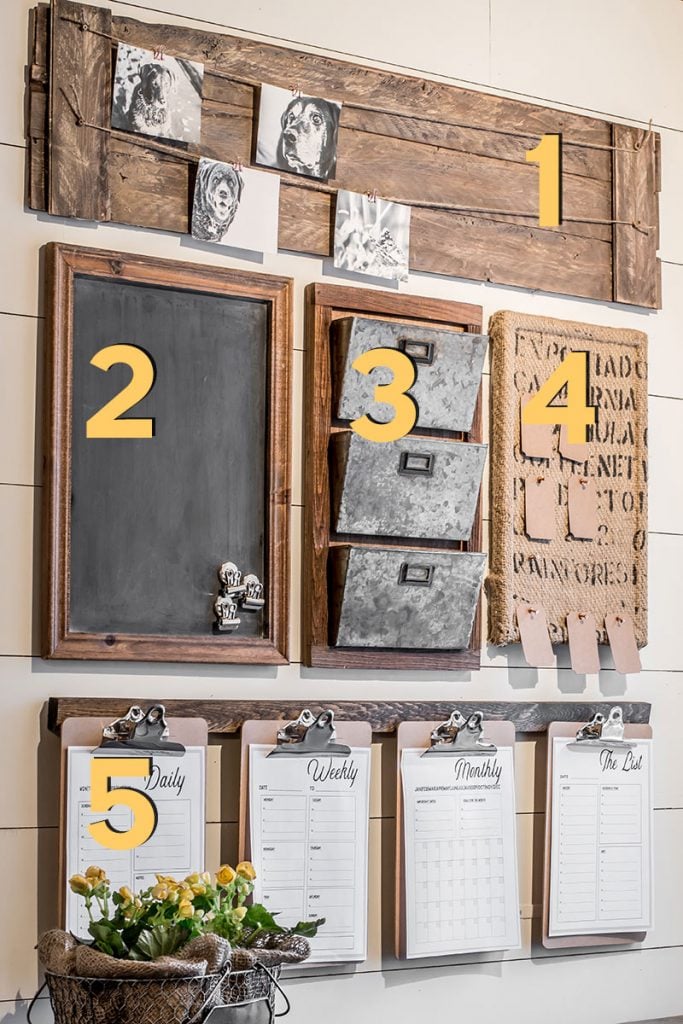
#1 – Picture Board Hanger.
~This post may contain affiliate links. If you click one and make a purchase, I may receive a commission at no additional cost to you.~
This was a 100% DIY project made from some leftover tongue and groove boards. It was inexpensive and super quick to build. It added a bit of fun to the home command center. It’s a great place to clip reminders or photos of the kids.
Supplies
Tongue & groove boards – They are also called pine paneling, and you should be able to find them at a local hardware store. I found mine in Canada at Home Hardware.
Natural Jute Twine
Black Zinc Plated Finish, 1/4″ Length ![]() Or use any small screw you want, I liked the color, so I used these.
Or use any small screw you want, I liked the color, so I used these.
Gorilla Wood Glue![]()
Minwax Wood Stain, Dark Walnut![]()
White paint – you can use anything here a little leftover paint will do the trick or even a blob or two from an acrylic tube.

1. I used tongue and groove boards. A package is only 9.99, and you could make at least two of these picture hangers from one box. I cut three pieces the size I needed for my space (42 inches).
I found mine in Canada at Home Hardware. I checked the US sites, and I couldn’t find a similar product although I am sure they exist. My boards were 3.5 inches, 6 feet long and one packaged covered 14 square feet.
2. Once I had my boards cut I glued them together with Gorilla wood glue. I used lots, and I didn’t worry about glue getting on the front because there would be sanding and staining that would remove the glue. We love Gorilla Glue. It is our go-to wood adhesive.
3. I clamped my boards together, but you don’t have to. So long as you glue the boards well, they will hold up. Just make sure they are inserted into one another and let them dry for 24 hours.
4. When my boards were dry, I added a side piece to each end. My side pieces were 10.5 inches. I glued them to the front of the picture hanger and used clamps to keep them together. If you don’t have clamps use something heavy to keep the boards together while they dry.

- Once everything is dry, you can start to stain. You can do whatever you want with your picture hanger: paint, stain or leave it raw. It doesn’t matter. Whatever you like, whatever is “you,” go for it. The following steps are the steps that I took to create the worn barn wood look I created for my picture board.
- Make sure you get your stain in all nooks and crannies and don’t forget the sides.
- Once your stain dries, you can add the coat of white paint. I scraped it on and forced it into the grain of the wood without leaving behind a lot of paint.
- Just keep scraping it on in spots all over your board. Don’t use paint on the whole surface only in spots.

- Once the white paint is dry, give your board a good sanding. Be sure to rough up all the edges and take off a bit of stain and paint.
- The next step is to add a very light coat of Minwax White Pickling Stain. I added a light layer all over the board. You can get a similar look by using very watered down white paint. I would use a 1 part paint -4 parts water. You want it to be a very light coat.
- Once the white pickling dries, you can add another light coat of stain. I used Minwax Early American, but any stain here will do.
- Give it one more quick sanding, feather out areas that have harsh lines, and rough up the edge.
- I used four small 1/4 inch screws and just added 2 to each end. I put my screws 3 inches from the bottom and 3 inches from the top.
- String twine between the screws, keeping it taught. I had a hard time with this step because I kept tying off the twine too soon and leaving behind too much slack.
#2 Chalkboard
I didn’t make my chalkboard, I found it at Michael’s on clearance last fall, but you could do this with any framed board, including an old picture frame. This board was a shiny metallic; I just added two coats of Rust-Oleum Chalkboard Paint![]()
![]() . It took two layers over two days, but it created the perfect chalkboard finish.
. It took two layers over two days, but it created the perfect chalkboard finish.
Also – this stuff stinks to high heaven, so open a window or use it in a well-ventilated room.
#3 Metal Pockets
The metal pockets for the command center were also a buy from Michaels, but you can find metal pockets just about anywhere these days. This one had raw wood, and I only added the stain. It’s great for corralling the mail until I have time to deal with it.
#4 Push Pin Board
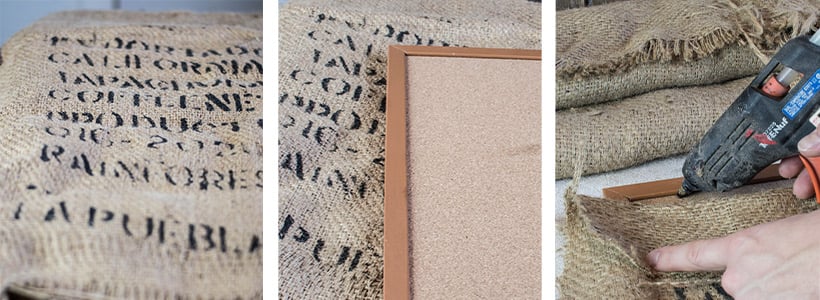
I ordered a simple 18×12 wooden framed Quartet Bulletin Board![]() with the intent of painting it. Before I had the chance to paint the board, I found a few burlap coffee sacks that were kicking around from an old gardening project that never happened. Perfect. I used the burlap sack to cover the board.
with the intent of painting it. Before I had the chance to paint the board, I found a few burlap coffee sacks that were kicking around from an old gardening project that never happened. Perfect. I used the burlap sack to cover the board.
Glue guns are my favorite craft tool by far. I just glued my coffee sack to my board and called it a day. Super easy and now it matched my rustic industrial command center theme.
#5 Clipboards are perfect for your Home Command Center
I picked up my clipboards from the dollar store. I had it in my head that I was going to paint them black, but once got them home and put them up, they worked well enough that I could just leave them alone. The best part – I bought all four for $6.00. They were the perfect addition to my home command center, and they keep me organized through the week.
I also used a simple 1×2 with a few 1/2 inch screws to hold the clipboards. I used command strips to the hold the 1×2 to the wall, and it worked perfectly.

The calendar sheets I designed for my use. If you want a copy for your personal use, you can find them in our freebie area. You can gain access to our freebie area by joining our mailing list. You can find the planning sheets along with lots of additional crafty extras.
Can’t Get Enough DIY?
If you like DIY projects, you may like these enjoy these posts!


It’s so functional, I can only hope to live up to the organizing standards it will give me! You definitely have a great eye for DIY!
Thanks for the comment, Kim! And don’t let pretty pictures on a website fool you, my house looks like someone broke in last night, and the night before. 😉 The command center does help me keep all my information in one place, but it might be the only thing in my house that is functionally organized.
Wow! I am pinning this command center. I love the printouts too. Happy Crafting, Kippi #kippiathome
Thanks for the Pin Kippi and the comment, I hope the printouts come in handy! Cheers!
I love this idea and also your wall color…can I ask what color that is? I’m having a hard time finding a good cream color for my kitchen!!!
Hi Lisa, that wall color is Sherwin Williams Alabaster. I must have tried out 12 different whites and creams on my walls before choosing that one. It works really well with the wood and very neutral, not too warm and not too cool.
I love your command center calendars! I’m not seeing a place to download. Are they free to personally use? I’d love to use them to organize my craziness.
Hi Macy, They are located toward the bottom of the post. You will see a picture of the 4 pages together and then just below that there are yellow clickable links for daily, weekly, monthly and list. You’re free to download them for personal use. I hope they help! If you still can’t see them let me know.