DIY Christmas Ornaments you Can Make Faster than a Melting Snowflake

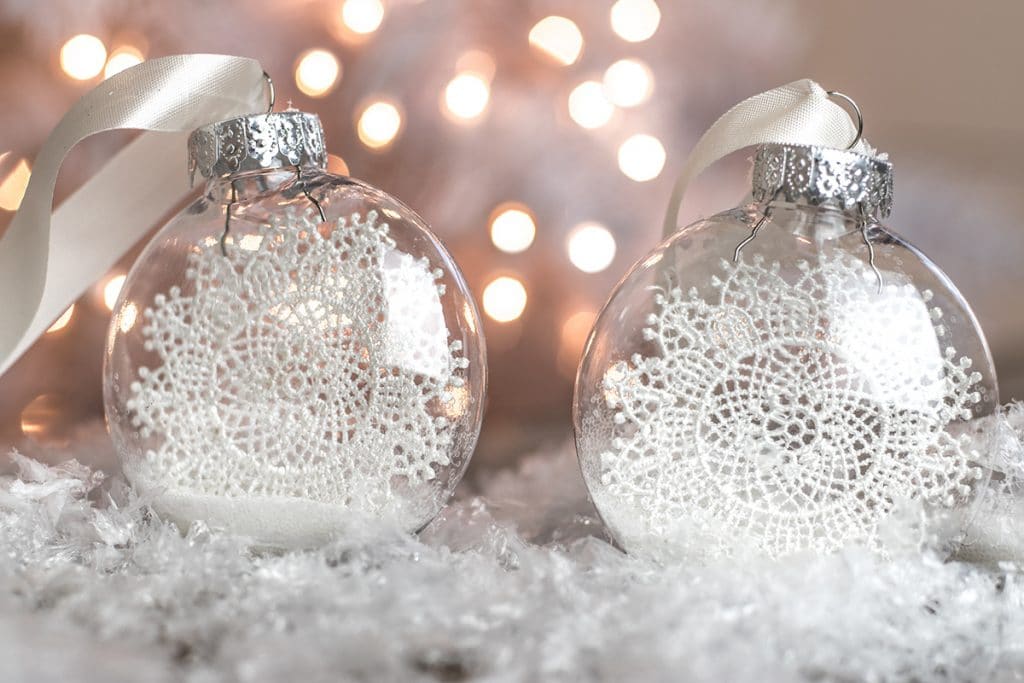
These DIY Christmas Ornaments are so cute! They look like trapped snowflakes and have a little bit of vintage feel.
They also couldn’t be easier to make, the only trick is making sure the snowflakes fit. I explain a bit more about that below.

I beefed up my snowflake ornaments by adding bits of fake snow and glitter.
Let me tell you, glitter and I – well we’re mortal enemies. I wonder why I ever broke out the glitter in the first place for this project.
Every single time I use glitter, it ends up everywhere. This time I spilled an entire large tube of glitter ALL over my office floor.
It’s everywhere, I image we will be finding it for the next decade.
But the glitter and fake snow are entirely optional. If you’re a clutz like me, skip the glitter.
Snow, snowflakes and all things winter inside DIY Christmas ornaments
Anyone remember the episode of Gilmore Girls when Lorelai knows it’s going to snow? She goes outside with this big ridiculous smile and sure enough, the first snowflakes of winter fall and she couldn’t be happier. (If you’re a Gilmore Girls fan, leave a comment!)
That’s me – I love snow.
Liking snow is probably the only thing I have in common with Miss Gilmore (oh wait I have a Jeep and wait there is that coffee thing ..and maybe…Oo).
I digress… but I do love snow. Like Lorelai, I love the smell of it in the air.
But only that first snowfall! I tend to get over my first snow infatuation around January when it’s -40 and going outside means likely dying from exposure.
I exaggerate the dying part, not the -40 part.
Let’s also add that I am also not at all fond of snow the last day of summer (happened this summer!!!).
But I do enjoy those first snowflakes of winter because they remind me of the holidays.
That’s what I wanted from these ornaments, something that said “snow”.

Materials & Tools
~This post may contain affiliate links. If you click one and make a purchase, I may receive a commission at no additional cost to you.
I only ever recommend what tools or materials I use for my projects. I also test all my projects before publishing and if something doesn’t work, I don’t share it! ~
This project does not require a lot of materials. I purchased my small applique snowflakes but if you can crochet, you can absolutely make your own. Make sure that your snowflakes are at least 1/4″ smaller than the ornaments so they don’t bend inside.
The second thing to consider if you make your own crochet snowflakes is stiffness. You will need to give them a good starching prior to inserting them into your DIY Christmas ornaments. You want your snowflakes to stand up straight and flatten easily without a lot of fixing and fidgeting.
AND – no worries if you don’t want to crochet, or buy snowflake appliques, you can get the same effect with plain old paper. I would use a heavier cardstock (40 lb) to ensure they stand up, but it would be a great project for older kids who can cut out their own snowflakes.
Plus I think everyone has fond memories making snowflakes out of paper when they were kids.
Materials
- Double Face Satin Polyester Ribbon, 5/8-Inch White
- Glitter Sparkling Crystals, Clear
- Clear Glass Disc Ornaments: 3-1/8 inches flat, not round.
- Sparkling Snow
- Snowflake Embroidery Lace Applique – 2 3/4 inch
Tools
- Scissors
 If you want a really great pair of fabric scissors these ones are the ones I use and absolutely love. I got tired of pulling dull scissors out of the cabinet and fighting to try to cut anything with them. These were well worth the investment.

Step 1
Remove all the caps from your ornaments and set them aside.

Step 2
Gently curl your small crochet snowflake and insert it into your ornament. Don’t curl them too much, or leave them curled for too long or they will not open flat inside the ornament.

Step 3
Your crochet snowflake will unfurl inside the ornament and stand up straight.
If you buy crochet snowflakes and they are not stiff, add a coat of starch to make them stiff.
We want the snowflakes to stand up on their own and not slump or flop over.
The snowflakes I used were very stiff, uncurled very easily and stood up without assistance.

Step 4
I added some fake snow and clear glitter to make them look like small snow globes.
If your snowflakes sit crooked, or lean, use a small knitting needle, or pencil, or chopstick (all long thin pointy things work) and move it around until it sits in the right position.
You will not need to do this at all if your crochet snowflakes fit inside without bending.

Step 5
Pop the cap back on your ornaments and add a ribbon. I used white silk ribbon to keep the ornaments all white and snow covered but these would be quite pretty with gold ribbon or even silver.
Clean off any excess snow and glitter on the outside of your ornaments and pop them on your holiday tree.

Cute- Easy- Fun!
These simple DIY Christmas ornaments are all kinds of fun. I’ve seen so many great ideas floating around Pinterest this year using these clear ornaments. Glitter, sprinkles, confetti, mini trees, the limit here is your imagination.
My favorite clear ornaments which seem to be quite popular on Pinterest right now are these pretty pink marble clear ornaments from Beth over at LifeStyle for Real Life. Check out her pretty holiday marbled baubles here.
More simple DIY Christmas Projects
If you want a few more homemade Christmas ideas, you should check out these holiday craft projects:
- A simple rustic yarn wreath you can make in 30 minutes
- Easy crochet ornaments – a little bit rustic and a little bit glam
- Easy Crochet wreath – Knock this project out in under an hour!
- DIY Dollar Store Wreath for Just $15
- Christmas Tree Storage Tips

Want even more easy holiday crafting ideas?


DIY Christmas Ornaments To Make for Your Holiday Tree
A mini snow storm ornament, complete with a giant snowflake. The perfect craft to add a bit of vintage charm to your christmas tree.
Materials
- Plastic Clear Ornaments, flat, not round.
- White Satin Ribbon
- Glitter ( I used clear)
- Fake snow
- 3 inch crochet doily in the shape of a snowflake
Tools
- Scissors
Instructions
- Remove all the caps from your ornaments and set them aside.
- Gently curl your small crochet snowflake and insert it into your ornament. Don't curl them too much, or leave them curled for too long or they will not open flat inside the ornament.
- Your crochet snowflake will unfurl inside the ornament and stand up straight.
- If you buy crochet snowflakes and they are not stiff, add a coat of starch to make them stiff.
- Add your extra bits and bobs to your DIY Christmas ornaments like fake snow, or glitter (or anything you want)
- Pop the cap back on.
- Add Ribbon and dust off any excess glitter or snow.
Notes
If you make your own snowflakes be sure to add spray starch to make them stiff.
You can always make these without the fabric snowflakes.
These DIY Ornaments would work with some delicately made paper snowflakes as well.

huge gilmore girls fan, love lorelai + snow relationship
*high five* from up north!
I plan on making these soon. Can you tell me what the ratio of snow and glitter is. Thank you.
Hi Anne, I honestly just sprinkled some in until I liked how it looked, but if I was a guessing woman I would say it was 1:1. Sorry for the late reply, we’re moving right now (worst time ever!), and it’s been absolutely crazy around here. Cheers and Happy New Year!
Going to preserve the many hand crocheted ornaments that my grandmother made me 30+ years ago. I love this idea. Thank you.
Hi Debbie, I absolutely love the idea of preserving your grandmother’s ornaments, it’s such a sweet idea! Thank you so much for your comment, it made my day!
I love your ornaments and have been looking for something to make with a bunch of antique crocheted doilies I found at a local thrift store.
And I am also a Gilmore Girls fan and my husband often said I was just like Lorelei. And my name is Lori lol.
Thanks for sharing
Lori ~ ourrepurposedhome
Hi Lori, I love vintage doilies, there is just something about them. If your vintage doily finds were small enough they would make absolutely beautiful hanging ornaments and I am a tad jealous because I never thought of finding and using vintage ones! Thanks so much for the comment.
So pretty and simple! Love your style, Laura! Pinned!
Thanks, Julie, I love your style too!