Creepy Glowing Halloween Specimen Jars – Quick & Easy!


Ok, Halloween crawlies and gross things are really not my jam. My husband, on the other hand, geeks out on Halloween and he is the one who came up with these super creepy DIY Halloween specimen jars.
He says “You’re welcome.” He’s fun like that.
They glow! I mean they really glow, like eerie creepy glowing, and the light is not short-lived. The lights in these things last a pretty long time plus they run on batteries, so you can keep them going all through the Halloween season.

Easy & Quick Halloween Craft Project
Start saving glass jars in all sizes. I had a few in my craft room and found a few at a vintage store. Save a few bucks by keeping an eye out for well-shaped jars from your own kitchen. Raid that recycling bin!
As for the creepy crawlies, get thee to a dollar store!
I spent waaaaaay too much on a few of my props for this project before hitting the dollar store. Once we got to the toy section in a Dollartree we hit the motherload of plastic bugs. We were able to pick up a few really gross, fairly large grasshoppers, flying insects, and spiders for a few bucks.
A Quick Note About The Waterproof Lights
The lights we ordered on Amazon and I will provide the link that we used. I was dubious they were going to work because they were so cheap. But they did!
The lights are waterproof and you can control them with a mini remote control that comes with the light set. Turn them off when you want to, or change the color of the water with the hit of a button.
And it goes without saying (but I have to say it anyway), these DIY specimen jars do not illuminate in the daylight. The room or the outside has to be dark to get the full effect.
We used these lights in a few Halloween projects this year and we loved how well they worked.

Materials & Tools required to make specimen jars
Honestly, the best place to gather up all this stuff is a dollar store, I will drop links for some of the items we purchased (like our overpriced yet very realistic tarantula), but don’t spend that kind of money. The murky water hides a lot of imperfections and makes even the most unrealistic plastic bug look pretty realistic.

Affiliate Disclosure
This post may contain affiliate links. If you click one and purchase, I may receive a commission at no additional cost. You can read our disclosure policy here.
Materials
- Empty glass jars with deep lids. Bigger jars are better for this project vs smaller jars because the lights hang a tiny bit from the lid, if the jar is too small the light will not fit.
- Plastic bugs, spiders, and all manners of fake creepy crawlies.
- Water
- Acrylic green paint
- Waterproof lighting ( we used this kit and LOVE it, it’s remote-controlled, battery-operated, and actually works! You can also change the colors)
- A few pieces of stiff cardboard. Save your cereal boxes.
Tools
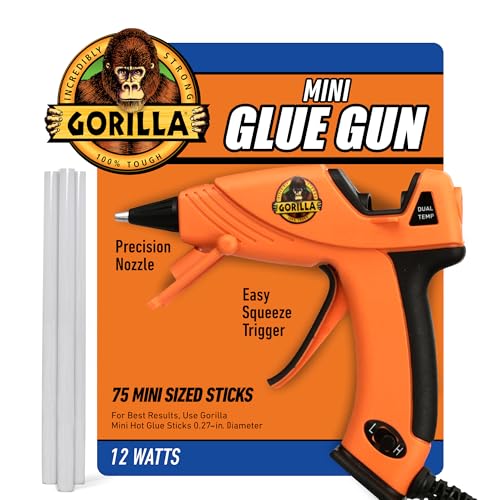
- Glue gun
- Glue gun sticks (you should only need one for 3 jars)
- Scissors suitable for cutting thin cardboard.
Step 1 – Wash & Clean the Jars
Make sure you remove all the stickers and residue from the jars. You think they won’t show up after the fact, but they do. Once the light hits the jars, every single sticker shows up.

Step 2
You need to use the glue gun to adhere to the lights to the top of the lids. If your lids are thin and narrow, you will be able to see the lights. I looked for jars that had really wide lids (like vintage mason jars).
If the lid is glass or metal, the light will not stick to it very well. Our solution to that problem was to glue a piece of thin cardboard to the inside of the lid and let it dry. This made it easier to use the glue gun to stick the lights to the lid.

Step 3
Figure out what creepy crawlies you want in each jar before filling with water. Trust me, it makes it WAY easier when you have it done in advance. Once you decide on what bug or spider fits where then remove them and put them aside but remember what jars they were going into.

Step 4
Add a TINY drop of green acrylic paint to water, stir, and fill your jars. You do not need a lot of paint for this, we just need enough to murk up the water.

Food dyes will not work for this project, we need paints with a tiny bit of white in them so the light reflects and adds that eerie glow. Food dye just doesn’t offer the same effect.

Toss on the lid and give the jar a shake to get that paint dispersed.
Instant murky water and creepy Halloween specimen jars!
Step 5
Place the bugs, spiders, and crawlies in your jars and place the lids over the top.

Step 6.
Place the jars on a black tray, or black table cloth and add any extra leftover bugs for effect.

Glowing Halloween Specimen Jars for Inside or Outside Fun!
This project makes a great centerpiece for a table if you will never want to eat at ever again.
All kidding aside, it really is eye-catching and quite creepy. Kids will LOVE this project and it’s an easy one to pull together without a lot of specialty materials.
You can place all your spooky Halloween jars on your front porch with your pumpkins too, they will add a level of creepy wonder for all your October visitors.

Looking For More Halloween Projects?
We have a few more cute and whimsical Halloween projects you might enjoy:
- An Elegant Halloween Wreath For Your Front Door
- Gnome Witches and Vampires
- Creepy Giant Halloween Spider
- Elegant Orange Halloween Wreath
- Black Out Dead Flower Wreath
- 10 Free SVG files – Cute Halloween Sayings
- Jack-O’Lantern Shadowboxes
- Simple Foamcraft Tombstones
- Craft Glue 101: Your Guide to the Best Crafting Adhesives


Glowing Halloween Specimen Jars
Eerie glowing specimen jars for your Halloween home decor. This is a very simple project you can pull together in under 30 minutes. The jars glow brightly in the dark!
Materials
- Empty glass jars with deep lids.
- Plastic bugs, spiders, etc
- Water
- Acrylic green paint
- Waterproof lighting
- A few pieces of stiff cardboard
Tools
- Glue gun
- Glue gun sticks ( you should only need one for 3 jars)
- Scissors suitable for cutting thin cardboard.
Instructions
STEP 1 – WASH & CLEAN THE JARS
- Make sure you remove all the stickers and residue from the jars. You think they won’t show up after the fact, but they do. Once the light hits the jars, every single sticker shows up.
STEP 2 - GLUE LIGHTS TO LIDS
- You need to use the glue gun to adhere to the lights to the top of the lids. If your lids are thin and narrow, you will be able to see the lights. I looked for jars that had really wide lids (like vintage mason jars). If the lid is glass or metal, the light will not stick to it very well. Our solution to that problem was to glue a piece of thin cardboard to the inside of the lid and let it dry. This made it easier to use the glue gun to stick the lights to the lid.
STEP 3 - PREPARE THE SPECIMEN JARS
- Figure out what creepy crawlies you want in each jar before filling with water. Trust me, it makes it WAY easier when you have it done in advance. Once you decide on what bug or spider fits where then remove them and put them aside but remember what jars they were going into.
STEP 4 - COLOR THE WATER
- Add a TINY drop of green acrylic paint to your jars and fill the jars with water leaving 1-inch headspace at the top. You do not need a lot of paint for this, we just need enough to murk up the water.
- Food dyes will not work for this project, we need paints with a tiny bit of white in them so the light reflects and adds that eerie glow. Food dye just doesn’t offer the same effect.
- Toss on the lid and give the jar a shake to get that paint dispersed.
- Instant murky water!
STEP 5 - FINISHING UP
- Place the bugs, spiders, and crawlies in your jars and place the lids over the top
- Place the jars on a black tray, or black table cloth and add any extra leftover bugs for effect.
Notes
- Try to keep the cardboard insert dry. Do not shake the jars once the lights have been added to the jars.
- The IR remote control for these lights will work through the glass no problem, so you can set these up, change the colors on a whim, or turn them on or off with ease.
- You can reuse these jars for next year, simply clean out your jars, give your creepy crawlies a wash and dry and store everything away for next year.
- These make a very creepy addition to a front step or porch surrounded
Recommended Products
As an Amazon Associate and member of other affiliate programs, I earn from qualifying purchases.


Is the green acrylic paint only if you want to make them green with the light? What if I want to use a blue light or red light… would I still use ewww paint in the water? Or would I use red with red and so on?
Hi Sarah, in our photos we show all the different colors and all the water was done with the same green paint. Really it doesn’t matter what color you use, so long as it has a bit of white in it (white paint would work fine as well). Cheers!