Eerie Glowing Halloween Shadow Boxes – Free SVG File Download

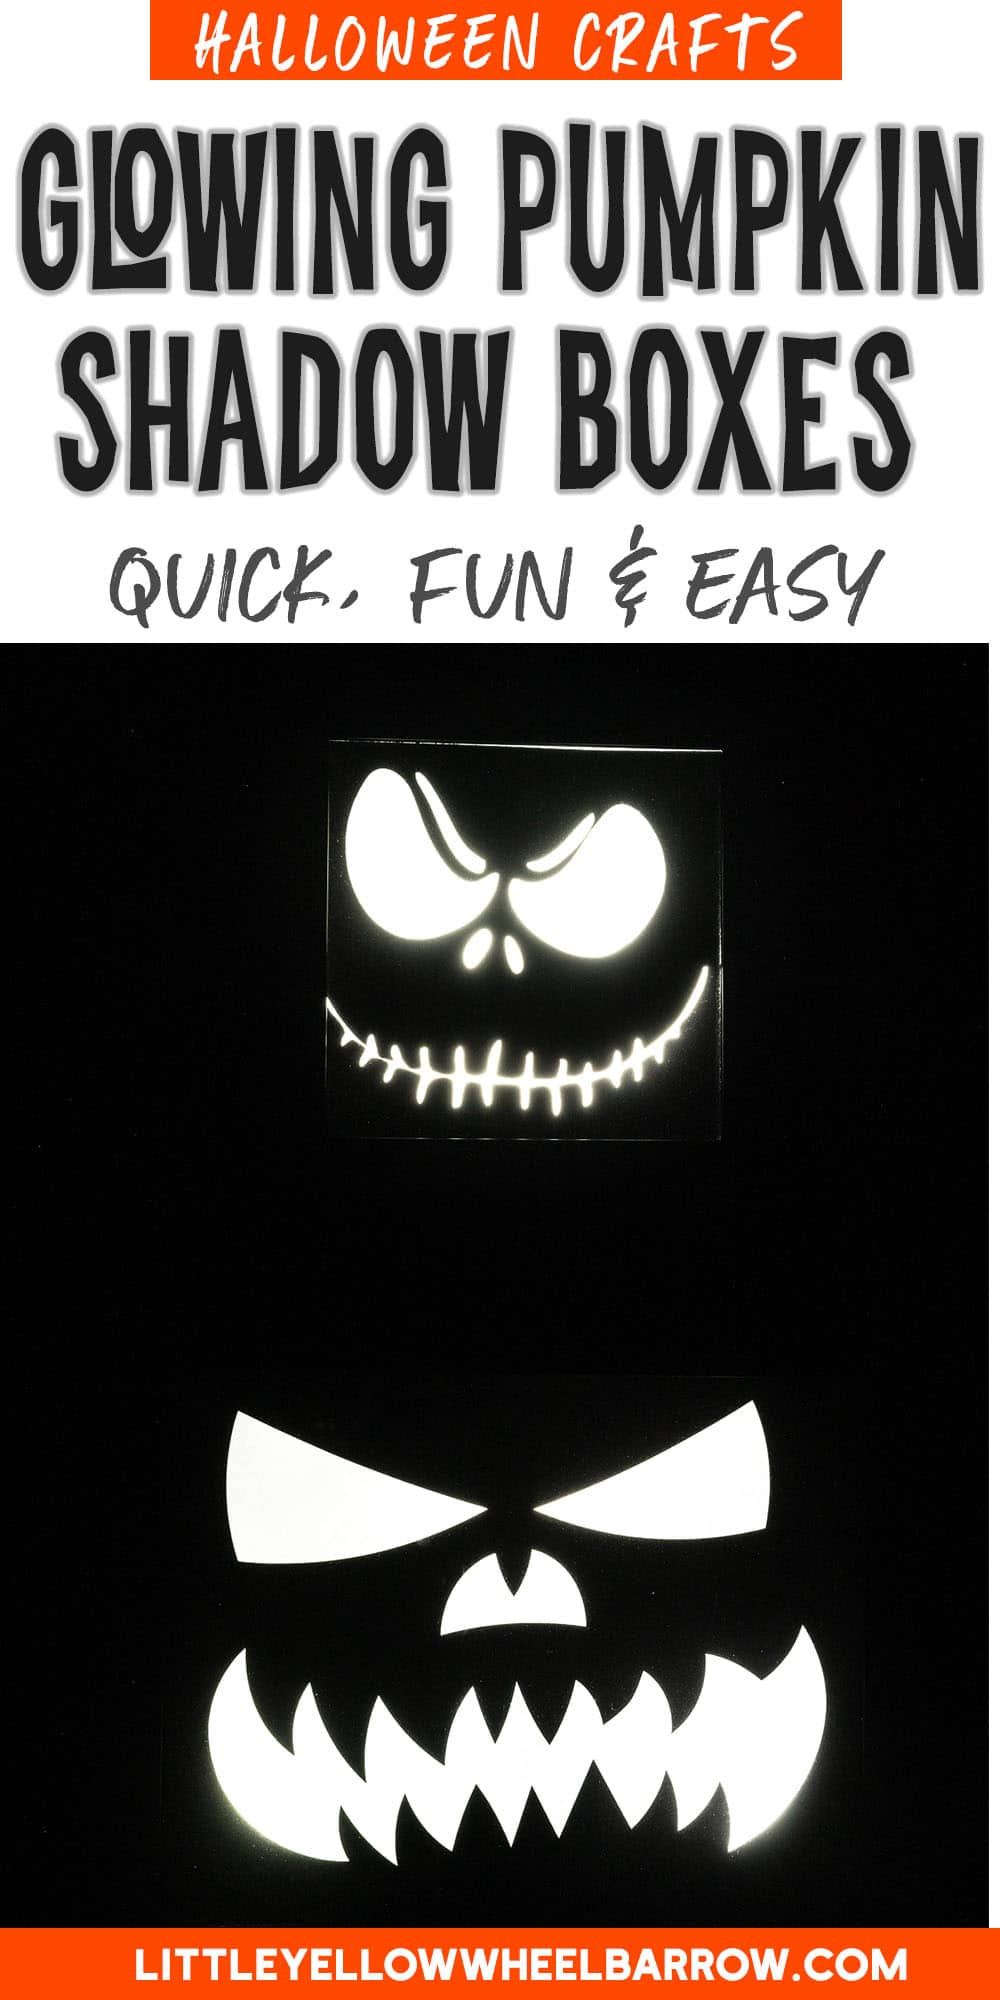
This was an unbelievably quick and easy Halloween project. It ends up looking smashing on a wall or as a display. The eerie pumpkin faces are illuminated and glow brilliantly in the dark. It seems like a complicated project, but I promise it’s incredibly easy!


With or without a Cricut
This project is intended to be made with a Cricut cutting machine. It makes the job super quick and easy.
However, if you are a patient person and do not have access to a cutting machine, you can make these with a very sharp Exacto precision cutting blade and a cutting mat. Although the Cricut will produce sharp, neat edges, you can get very similar results if you take your time manually cutting.


Affiliate Disclosure
This post may contain affiliate links. If you click one and purchase, I may receive a commission at no additional cost. You can read our disclosure policy here.
Materials required
- Shadow boxes (any size up to 12×12) Be sure the shadow box is deep enough to accommodate your lights.
- Tinfoil (sized to the same size as your shadow box)
- Black card-stock paper (or scrapbook paper)
- Tracing paper
- Tape
- Lights (we used these in several Halloween projects this year and loved them)
A note about the lights we used – The lights are waterproof and controlled by a remote control that actually works pretty well. The lights are quite inexpensive, and I figured they would be a bust, but they were actually really good for our Halloween projects. They also take batteries so that you can use them again. They also have different settings for different colour lights.
You can see them in action in our DIY Giant Spider Post and our super creepy specimen jar project.
Tools required
If you are making this project without a cricut:
Step 1
Download the templates from the link below.
If you are using a Cricut, upload the SVG files into Designspace and import them into a new project. Be sure to click “Attach” in the bottom right corner to keep the pieces in the right place.
Resize the cutout to match the size of the frame you’re using. Click “Make It” and center the cutout on your paper on the cutting mat layout before clicking “Continue”.

If you don’t have a cutting machine, download the JPG files and print them onto regular copy paper. You might have to change some settings in whichever program you’re using to get it to print the right size.
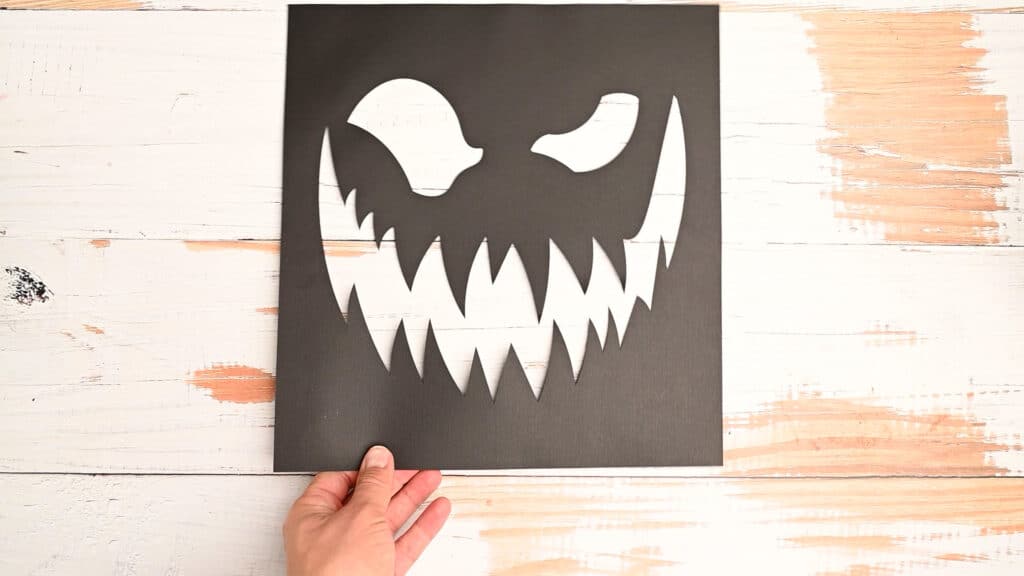
Cut the design out using an Exacto knife and cutting mat, then trace it onto your black card-stock paper, and cut that out with your Exacto, too.
Step 2
Cut the card-stock to fit the inside of your frame, and tape it onto the inside of the glass. If there are gaps at the edges you can tape on some scrap pieces of card-stock to close them up.


Tape 4 sheets of tracing paper to the back of the card stock, covering the eyes, nose, and mouth.
Step 3
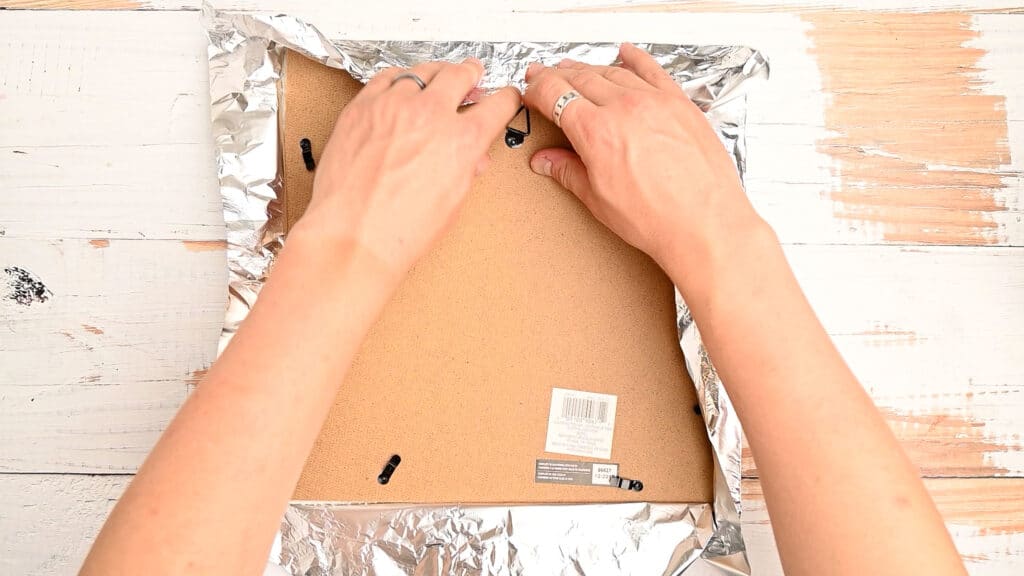
Cover the backing of the frame in tinfoil. This will help reflect the light inside the frame.


Hot-glue several remote LED lights to the tinfoil. How many you need depends on how big your frame is. For our smallest frame, we only used one, for our largest we used four. Be sure to glue them in places where they will be behind the card stock, not in the openings.
Put the backing back onto the frame, and use the remote to turn on the lights and set the colours!
Final Thoughts
This is an incredibly easy project that can be undone. What do I mean? I mean you can claim back the shadowboxes when the project is finished and put it all away again for next year.
From downloading the print file, cutting it out, and assembling the shadow boxes, you will spend less than 20 minutes.
These look great during the day but really stand out in the dark. I suggest an area of your home that doesn’t get a lot of light at night, like a dark hallway, or a room without windows!

Looking For More Fun Halloween Projects?
- Giant Halloween Spider (made from bubble wrap and coat hangers!)
- Gnome Witches and Gnome Vampires ( no-sew with free download pattern)
- Glowing Specimen Jars
- 10 Free Halloween SVG Files (free download, no list to sign up for!)
- Easy ” Boo & Eek!” Halloween bunting Free SVG Downloads
- Easy No Carve Pumpkin Display for your Halloween Table.
- Creepy Glowing Halloween Specimen Jars – Quick & Easy!
- Foam Halloween Gravestones
- A Dollar Store DIY Halloween Wreath (Only $15.00!)


Eerie Glowing Halloween Shadow Boxes
Quick and easy glow in the dark Halloween shadow boxes. These look so good in a dark room or hallway when they are lit up!
Materials
- Shadow boxes ( any size up to 12x12) Be sure the shadow box is deep enough to accommodate your lights.
- Tinfoil ( sized to the same size as your shadow box )
- Black scrapbook paper
- Tracing paper
- Tape
- Lights ( we used these in several Halloween projects this year and loved them)
Tools
- Cricut Cutting Machine
- Scissors
- Green Cutting Mat
Instructions
Step 1
- Download the templates. You can find them under Step 1 of the project in the blog post.
- If you are using a Cricut, upload the SVG files into Designspace and import them into a new project. Be sure to click "Attach" in the bottom right corner to keep the pieces in the right place.
- Resize the cutout to match the size of the frame you're using. Click "Make It" and center the cutout on your paper on the cutting mat layout before clicking "Continue".
- Upload the SVG file to Designspace and cut on black card-stock paper.
- If you don't have a cutting machine, download the JPG files and print them onto regular copy paper. You might have to change some settings in whichever program you're using to get it to print the right size.
- Cut the design out using an Exacto knife and cutting mat, then trace it onto your black card-stock paper, and cut that out with your Exacto, too.
Step 2
- Cut the card-stock to fit the inside of your frame, and tape it onto the inside of the glass. If there are gaps at the edges you can tape on some scrap pieces of card-stock to close them up.
- Tape down the cutout, then cover the eyes, nose and mouth with 4 sheets of tracing paper.
- Tape 4 sheets of tracing paper to the back of the card-stock, covering the eyes, nose, and mouth.
Step 3
- Cover the backing of the frame in tinfoil. This will help reflect the light around inside the frame.
- Cover the frame backing in tinfoil, and hot-glue the LED lights to the foil.
- Hot-glue several remote LED lights to the tinfoil. How many you need depends on how big your frame is. For our smallest frame, we only used one, for our largest we used four. Be sure to glue them in places where they will be behind the card-stock, not in the openings
- Put the backing back onto the frame, and use the remote to turn on the lights and set the colours!
Recommended Products
As an Amazon Associate and member of other affiliate programs, I earn from qualifying purchases.


