How to Weave a Lovely Winter Wreath – It’s SO easy!
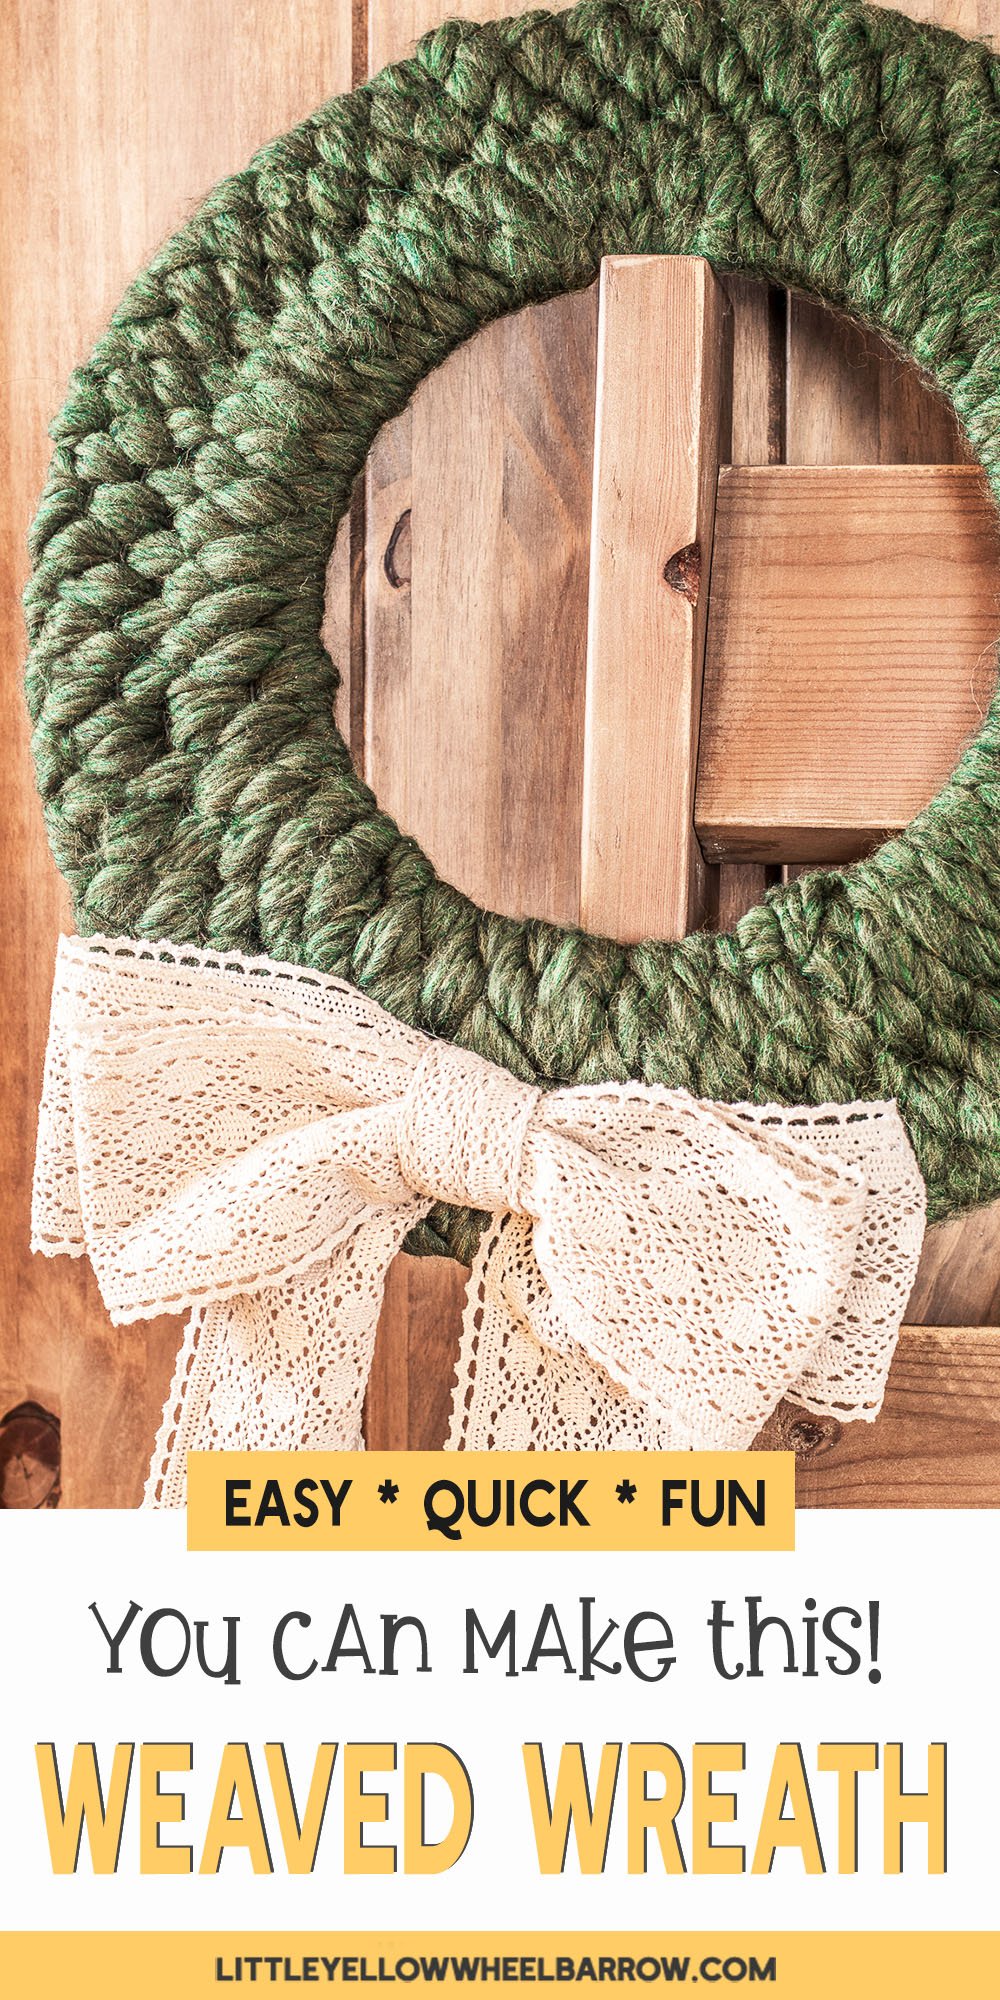
This pretty weaved wreath is perfect for the holidays. It’s a great little DIY you can knock out in about an hour and a half. It took me 2 weeks to make mine because I made it about 5 times before I was finally happy with the outcome.
This project requires two different-sized wire wreath frames that you connect together to make one. The bigger frame really does make a difference. It gives the wreath a lot of heft and a lot of texture. If you decide to try this project with one frame, I highly recommend using the smallest frame. If you use a single large frame, the wreath looks unbalanced.
This is not a difficult project if you can weave under and over, you’re golden.
Materials & Supplies
For this wreath, I used chunky wool from We Are Knitters, simply because I loved the colour and it matched my current holiday theme. You can use whatever chunky yarn or wool you want. I will explain further down in the post how thick your strands need to be so that regardless of what yarn you use, this project will work for you.
Save a few bucks and find the wire frames at your local Dollar Tree or Dollarama.
Materials
- 2 Balls of “the Wool” from We Are Knitters (my colour is spotted green)
- 1 wireframe 18 inches wide
- 1 wireframe 14 inches wide
- Ribbon for bow
- Floral wire
- Spray Paint (optional, you need to match your wreath frame colour to your yarn)
Tools Required
- Scissors
- Pliers
- Wire cutters
- Glue gun & glue stick (optional)
Wreath Crafting Supplies For The Beginner
Have you ever wondered what supplies and tools you needed to get started with wreath making? We put together an entire list of items that every beginner should have on hand.
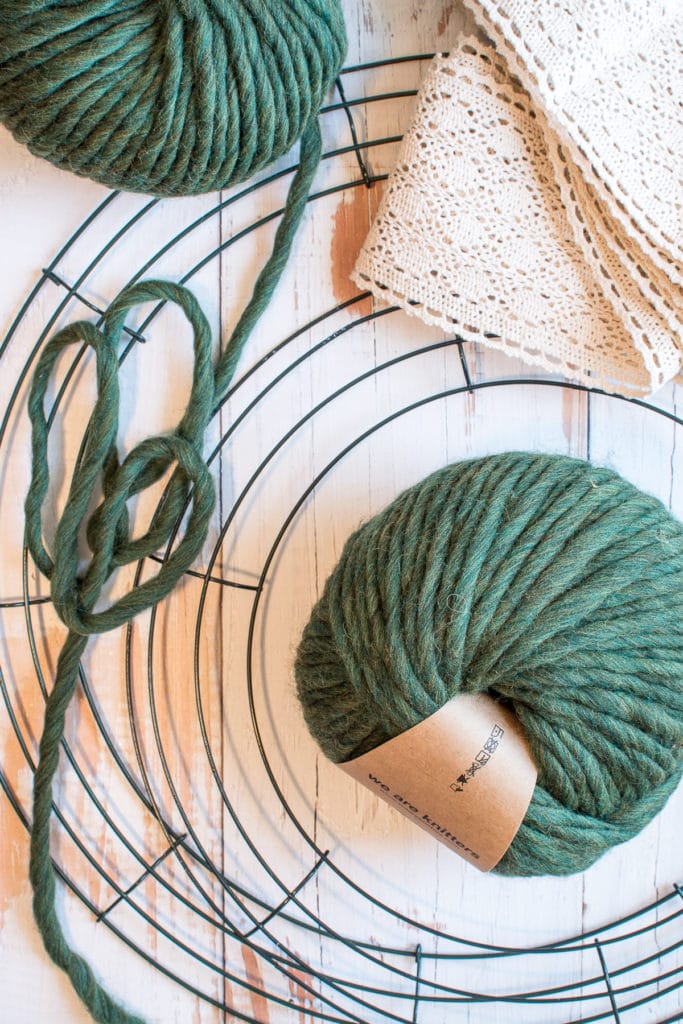
A note about the yarn you choose.
It doesn’t matter if you use thick yarn or thin yarn. You only need to ensure that the strands, bundled together, are at least 1 inch thick. If you want an inexpensive yarn that works up great and is the same thickness as the wool I used, I highly recommend Red Heart Grande Yarn.
Step 1: Matching your frame to your yarn
When you weave this wreath together, you do not see a lot of the wireframe underneath, but it does poke through in a few places. For this reason, I would recommend spray painting your wire wreaths to match the colour of your yarn.
Step 2: Attaching the frames together
Your two wireframes will not sit perfectly together, they will overlap a tiny bit.
- We want to connect the last outer ring of wire from the smaller wreath to the first inner ring on the larger wreath. They won’t sit on top of each other perfectly, but that’s ok, we can make it work.
- To attach the frames together, add small 2 inch pieces of floral wire to the rings we need to connect together and place them evenly around the wreath at about 3-inch increments.
- Tighten the wire with pliers and try to pull the wreath together so that the rings come together. If there is a tiny bit of space, that’s fine, but we do want to use the wire and the pliers to make those rings come together as closely as possible.
- Once you are happy with how the rings sit together, push the twisted wire to the back of the wreath and snip them off.
- I used a glue gun and used a tiny bit of hot glue to cover the tips of the snipped wires. They are super sharp and have a tendency to rip and tear at your fiber, especially if you are using wool. You also don’t want to get a nasty scratch from those snipped wires.
My darling husband waited until I finished to suggest I use tiny zap straps instead.
(great idea, thanks honey).
But seriously, small zap straps would work just as well. You want something that is going to help bend the wreath without snapping.

Step 3 How to bundle and attach your yarn to the wreath frame.
Pull about 24 feet of yarn from your skein, and fold it in half.
You will want to fold it in half a second time, creating one 6 foot length of wool, with 4 strands.
Find the center of the 6-foot length of yarn strands, and loop it through the outermost ring of the wreath form, close to one of the connector bars. You can see what I mean in the photo below.
TIPS!
- Do not be tempted to make your yarn length too long. If you go with longer lengths of yarn, they get tangled. Tangled like 8 strands of Christmas lights kinda tangled. Trust me on this.
- If you use wool the constant weaving and pulling through the wire loops creates some shedding too, which is greatly reduced by using a smaller set of yarn strands.

Step 4 Attaching the yarn strands
Loop the yarn through itself and tighten down. This will connect the yarn to your form without creating knots, or having to tie anything together.

Step 5 Weaving
The weaving is the easy part. You can see in the photo below we have created 7 rings by attaching two frames together. The middle rings that we connected with the wire, are now considered a single ring.
You begin by weaving over, and then under, all the way across the frame.
When you get to the inner ring, you simply come back the other way and weave over and then under all the way to the end.
TIPS!
- I tried weaving this winter wreath with single strands of chunky yarn as well as double strands, and the pattern really didn’t show. It wasn’t until I got a little crazy with 8 strands that the wreath really looked weaved, and had a texture you could see from across the room. So I know some of you are going to ask if it will work single-stranded, and the answer is yes, but it doesn’t look nearly as good (a personal opinion).
- If you used SUPER chunky yarn, like we are knitters XXXL wool, you would only need to single strand to weave this wreath! That yarn is super chunky, you can see just how chunky in my post for finger knitting a chunky blanket.

Step 6 Tips to ensure the wreath frame isn’t highly visible through the weaving.
You will need to push your weaving close together.
When you get to one of the crossbars, push your weaving tight together to make room to add more weaving before jumping over the crossbar. If you pass the crossbar too quickly, your weaving may be too loose, and you will see too much of the wire wreath poking through.

Step 7 Weaving in loose ends
Always finish weaving at either the first or last rung, never in the middle. If you feel you do not have enough yarn to complete a full row of weaving, stop, and weave those ends into the back of the wreath and start again with a fresh length of yarn.
Attach the next strand of yarn to the wreath frame the same way as you did in step 4.
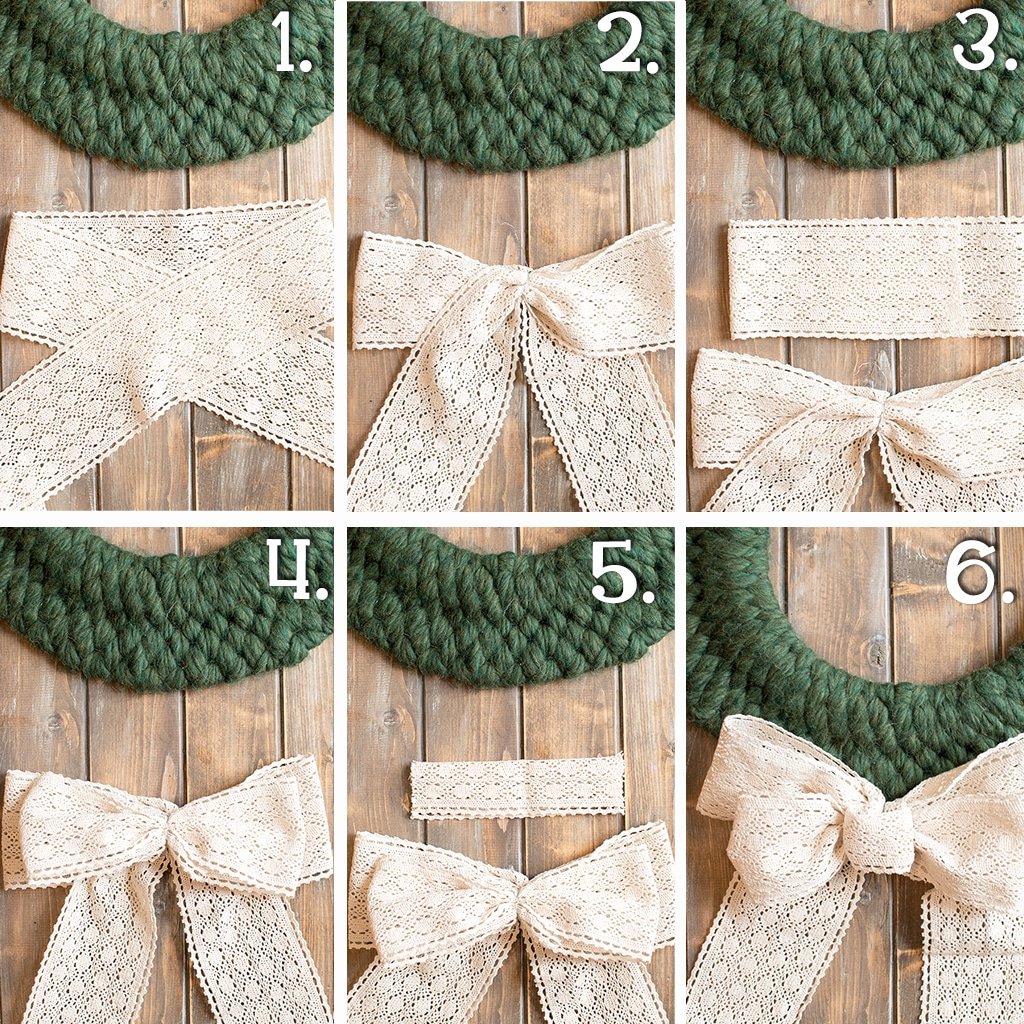
Step 8 Attach a bow
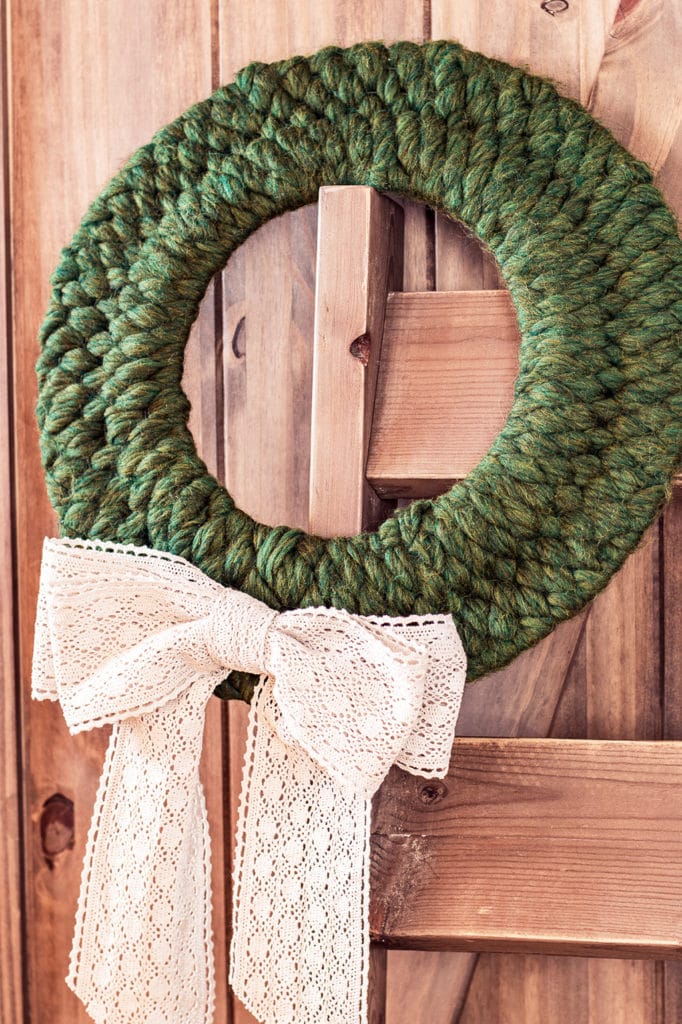
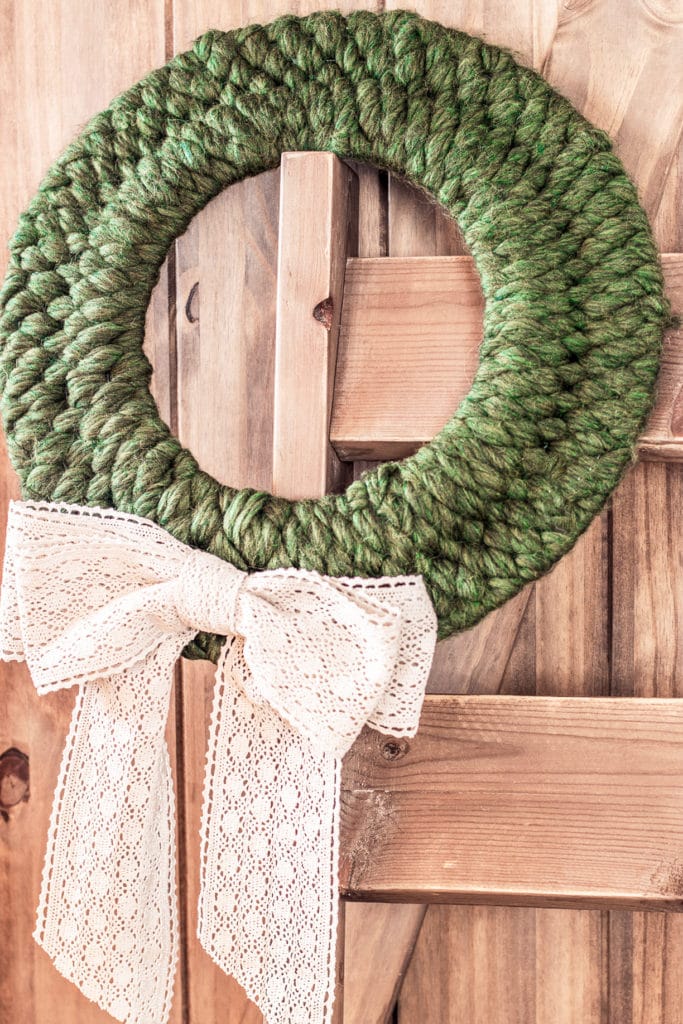
Attach a pretty bow and you’re done!
I made a lace fabric bow for this wreath, but you can use this method to make bows with anything from the ribbon, to fabric, burlap, anything really. All you need is a bit of floral wire, a pair of wire snips, and a pretty ribbon.
I am not adding in measurements, because each type of ribbon is different. I find working with wire-edged ribbon easier because you can shape it the way you want, but heavy fabric ribbons like the one I used in this example work very well too.
- Lay out your ribbon creating two loops on both sides. Make sure your tails are the length you want before you snip the ribbon.
- Once you confirm the length, and you like the width of the bow, wrap a 3-inch piece of floral wire through the center, and tighten down to pinch together.
- Make another double loop, without tails (or with you want), give about 2 inches of overlap before snipping the ribbon. I usually try to make my second ribbon layer about 1-2 inches smaller than the first bow you created.
- Add the second layer to the first ribbon layer and use the wire to loop around the second layer and twist to tighten.
- Take a smaller piece of ribbon and fold it in half lengthwise and create a loop.
- Add the loop to the top of the bow, and use the same wire you used earlier to connecting the loop to the top of the bow.
Straighten and fluff the bow into shape.
With a thin ribbon, you can add multiple layers to create even fuller bows.
A pretty design, without a complicated pattern
I love how this wreath turned out. I had the design in my head for a while, but I wasn’t exactly sure how I was going to make it work. I did try to use a single frame, but the wreath just didn’t have the oomph I was looking for, using the two frames to create one larger frame worked like a charm.
It looks like a complicated pattern, but it’s not. No real skill is required, but you get a pretty snazzy looking wreath in the end that I bet someone says “Where did you get this?”
This is a great wreath for the holiday season, but I will keep mine up for the entire winter season (which where I live feels like 10 months).
If you make this wreath, I would absolutely love it if you would share it. If you post it on IG, tag me!
More Christmas Craft Resources
- Beautiful Handmade Crochet Garland You Can Make in About 30 Minutes
- How To Decorate A Christmas Tree: 4 Simple Tips For A Professional Style
- Real Christmas Tree Care 101: How to Care for Live Christmas Trees
- Pretty Handmade Holiday Gift Tags – A Lovely Addition To Any Gift
- Lovely Epoxy Resin Coasters With Snowflakes and Glitter!
- Christmas Tree Storage: The Ultimate Guide
- A Rustic Wreath You Can Make in Under 30 minutes – No Really!
Also check out our wreaths for other holidays!
- A Dollar Store DIY Halloween Wreath
- All Black Halloween Wreath
- How To Make A Rag Wreath For Valentine’s Day
- Easy Yarn Pom Pom Wreath Anyone Can Make

