Beautiful Cranberry Red Beaded Wreath – Simple DIY Tutorial!


I’m a sucker for a perfect DIY Christmas wreath; it’s probably my go-to holiday “crafting” plan every single time. Unfortunately, I tend to have too many ideas for wreaths during the holidays, and I never get around to making the ones I want. Time seems to slip away during the holidays. I’ve wanted to make this beaded wreath for ages, and now it’s finally done! Finally, I can cross one of those craft projects from the incomplete list and say, ” I finally finished this!”
One note, this project does take a bit of time and attention, so put aside a few hours at least for the beading portion of the tutorial. Although the task is a little bit time-consuming, it isn’t difficult. Easy-peasy!

Beaded Wreaths : Tips & Notes
The great thing about this beaded wreath is the sparkle! These things shimmer and shine away, even in dim light. They add a “Wow!” factor to your holiday decorating.
There are only a few things you need to know to create the perfect beaded wreath:
- Be sure to paint or cover the wreath form the same colour you are using for your beads, so the wreath form doesn’t show through.
- Use a very small precise glue gun so you don’t over glue your beads and have the dried glue showing.
- Big beautiful bows go perfectly with these beaded wreaths, so go wild with ribbon!
Materials
Affiliate Disclosure
This post may contain affiliate links. If you click one and purchase, I may receive a commission at no additional cost. You can read our disclosure policy here.
You will need several bags of beads for this project. We picked ours up at Michael’s during a 30% off bead sale (great sale!), which saved us a significant amount on our final project. I will leave links to the rest of the products on Amazon, but I would highly suggest you check out your local dollar store for these items.
The same wreath form I bought at Michael’s for $7.00 Canadian was only $1.00 at my local Dollarama.
- Three bags of 8mm crystal style beads
- One 12-inch wreath form
- Paint in the same colour as your beads
- 4ft of 2-3 inch wide ribbon to create a bow
Check out our must-have DIY wreath supplies to have on hand for your craft room!
Tools
- Paintbrush
- Glue gun (small precise tip)
- Glue sticks

Step 1
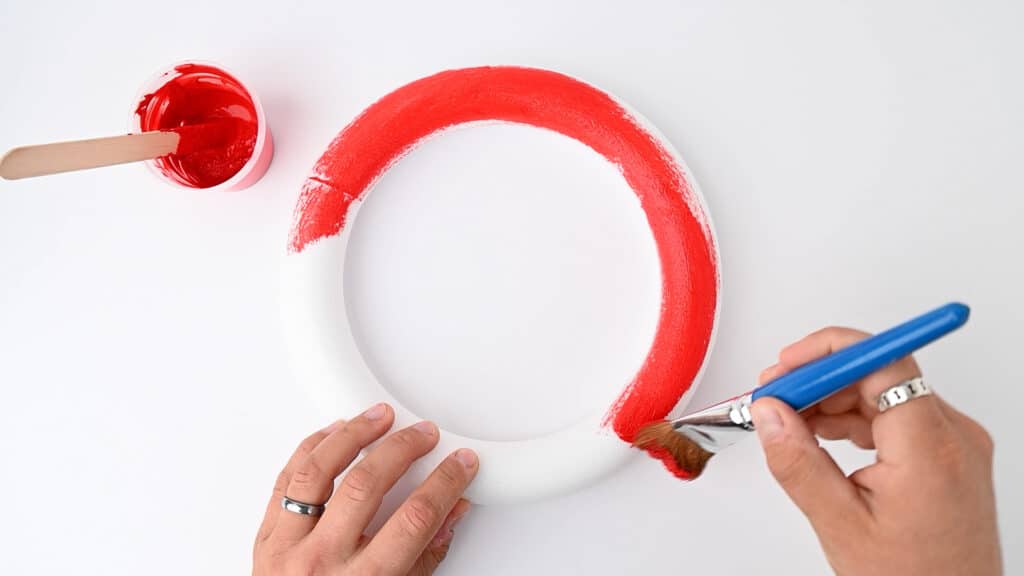
Paint the wreath form with one coat of acrylic paint (front and back) and allow the form to dry completely before moving on to step two. Don’t use any sort of aerosol or spray paint when working with Styrofoam wreath forms; it will melt the foam!
The paint is an important part of this project. If you skip painting, you run the risk of the form peeking through. Not a good look!

Warning!
Do not use spray paint on styrofoam! It will melt the foam, completely ruining it. I learned that one the hard way.
step 2
Once the form is dry, use your glue gun to start gluing down your beads. Be sure to glue the beads down so that the holes do not show along the top. You will also want to make sure that the beads are placed as tightly together as possible.
Be very careful not to use too much glue, or the glue will show in your final product.
We recommended the precision tip glue gun for this reason. It lets you control the level of glue far better than the standard-size glue guns.
I started out by dabbing a single drop of glue and applying the beads one at a time. Once a pattern started to emerge, I got comfortable enough to lay a glue line and place several beads in a row.
Continue gluing until you’ve covered the front of the entire wreath form. Depending on where you plan on displaying your wreath, you may not need to put beads on the back. Just make sure you get the beads at least partway around the back so that the wreath looks complete. It helps with the sparkle!


Safety Tip!
Hot glue is hot! To save your fingertips, use a pair of tweezers or needle-nose pliers or just a pair of rubberized garden gloves!
step 3
Clear off any hot glue strings. It will look like a spider has made a home in your beaded wreath if you don’t! Of course, you could use just our hands, but I found the best way was to use a soft dish brush – it could clean out between the beads without knocking them off.

step 4
Tie a large bow from your choice of broad ribbon, and hold it in place with a small bead of hot glue.
You can also tie a loop out of a smaller ribbon to give your wreath a handy hanger.
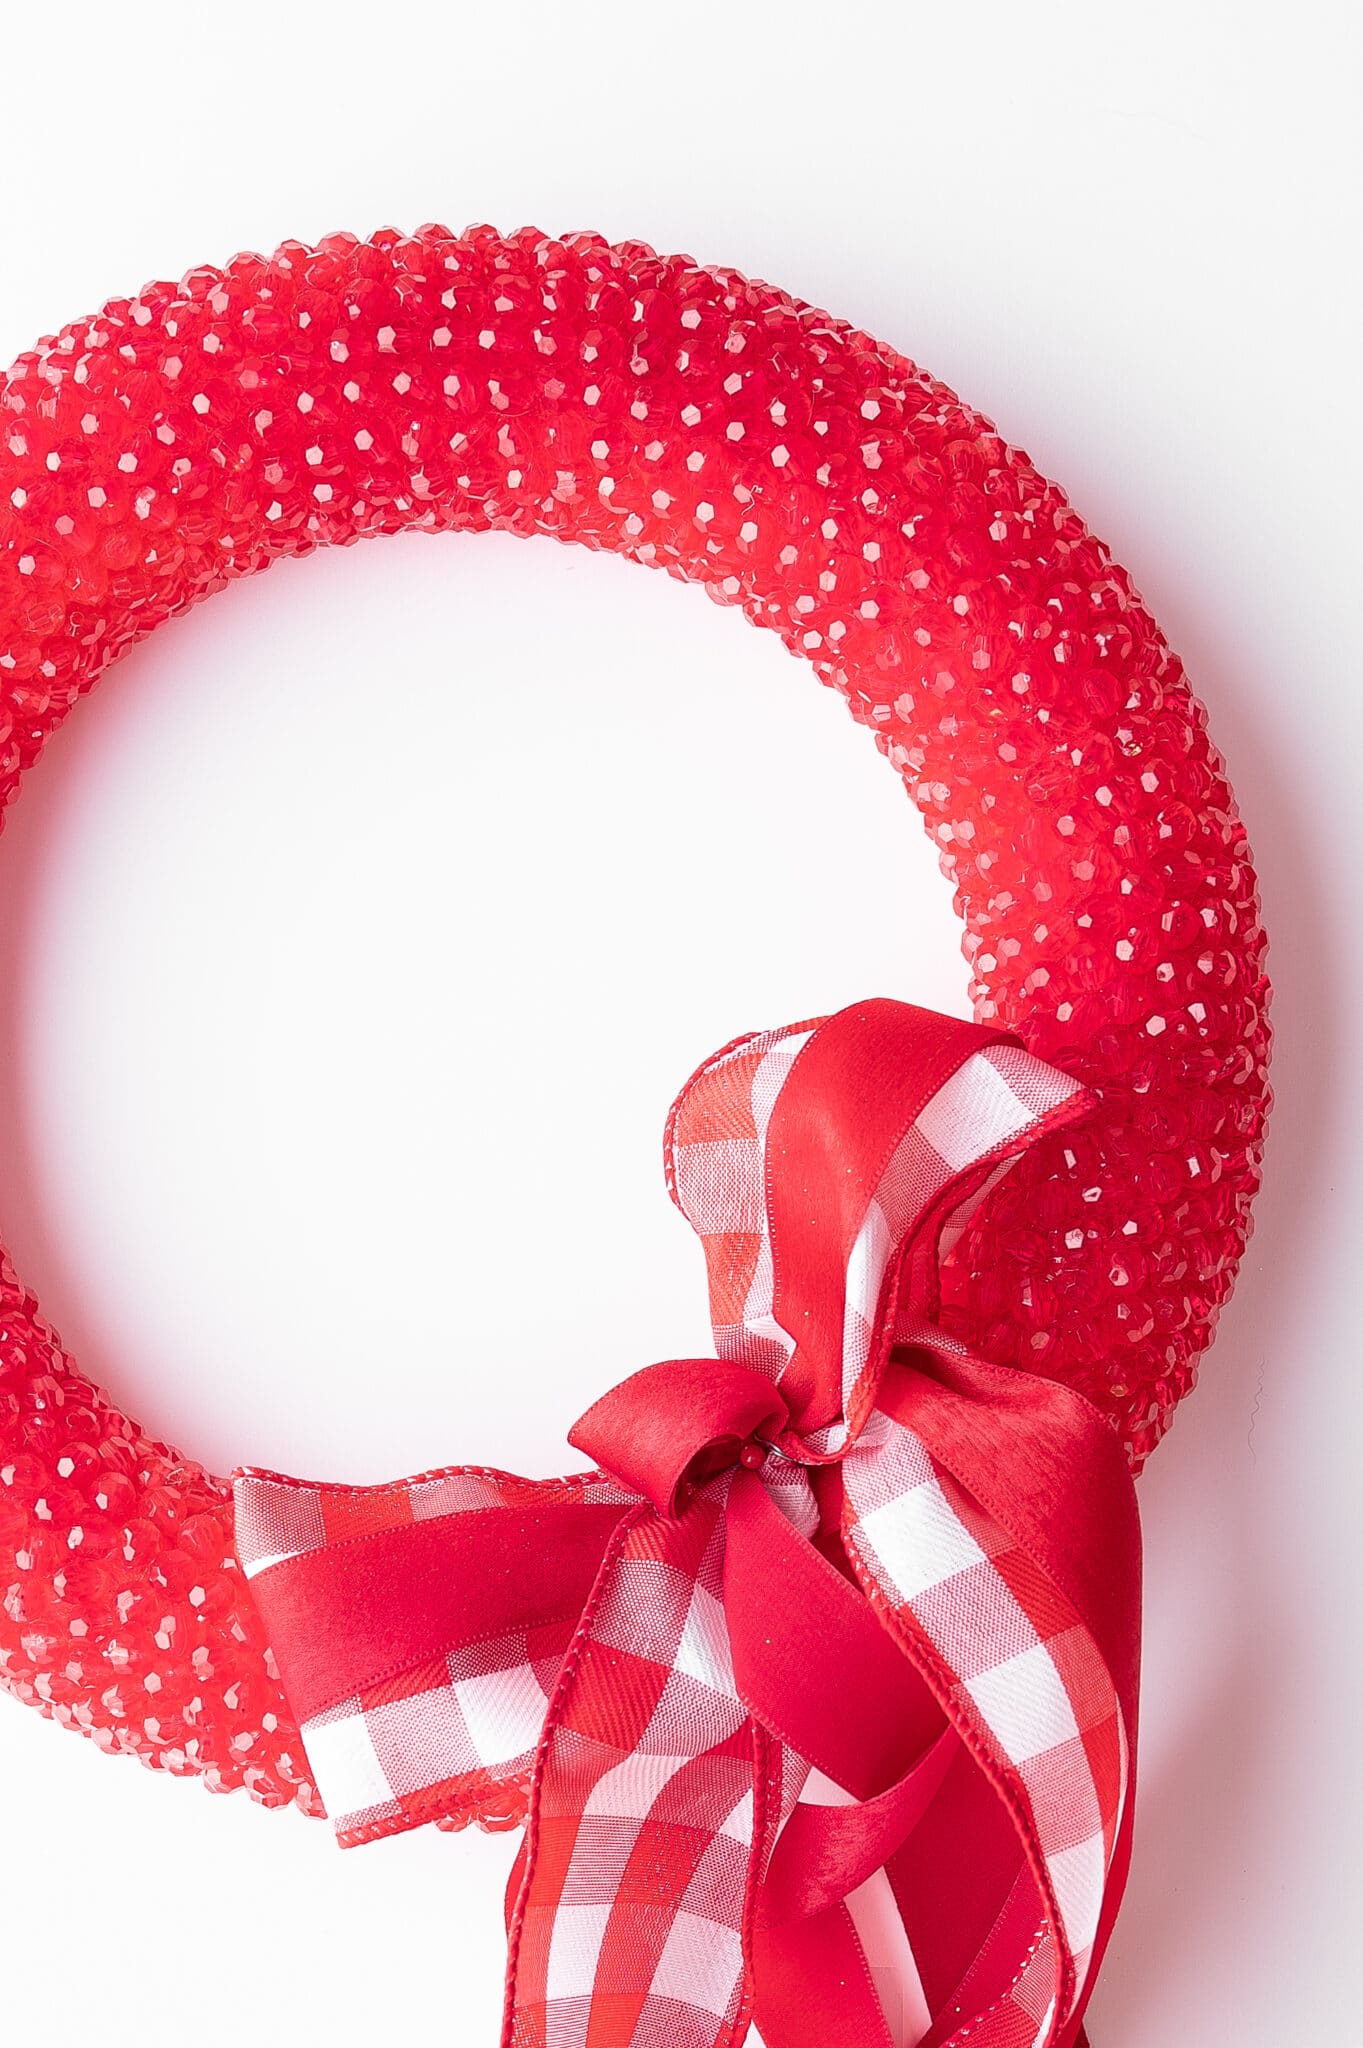
Now Showcase that Lovely Sparkly Wreath!
This is an effortless task, but it does take a bit of time. This wreath is about 9.5 inches across, but you could make it as large or even as small as you like. Follow the same steps, but order or pick up enough beads to finish the job.
We would love to see this wreath if you make it; tag us on social if you do!
Looking For More DIY Holiday Craft Ideas?
Check out these easy DIY projects for the holidays:
- Wreath Supplies You Need toA Dollar Store DIY Halloween Wreath (Only $15.00!) Make A Perfect Wreath
- How to Weave a Lovely Winter Wreath – It’s SO easy!
- Easy Dried Orange Garland For Your Holiday Tree!
- DIY Christmas Ornaments you Can Make Faster than a Melting Snowflake
- DIY Giant Halloween Spider Decoration to Scare Your Neighbours
- Creepy Glowing Halloween Specimen Jars – Quick & Easy!
- Halloween Tombstones: Easy DIY Decorations
- A Dollar Store DIY Halloween Wreath (Only $15.00!)

Your wreaths are out of this world! This is sooooo easy but striking.
Hey Amanda, thank you so much! I have to be real here my husband made that wreath. That’s him in the video. If you ever get a chance check out the giant spider on our site – he designed and made that himself. He’s pretty crafty! Also, your comment made his day. Cheers!